2.4 KiB
Lab 1: Verification
This lab follows my efforts of flashing, verifying, and interfacing with the hardware kit introduced in Lab 0
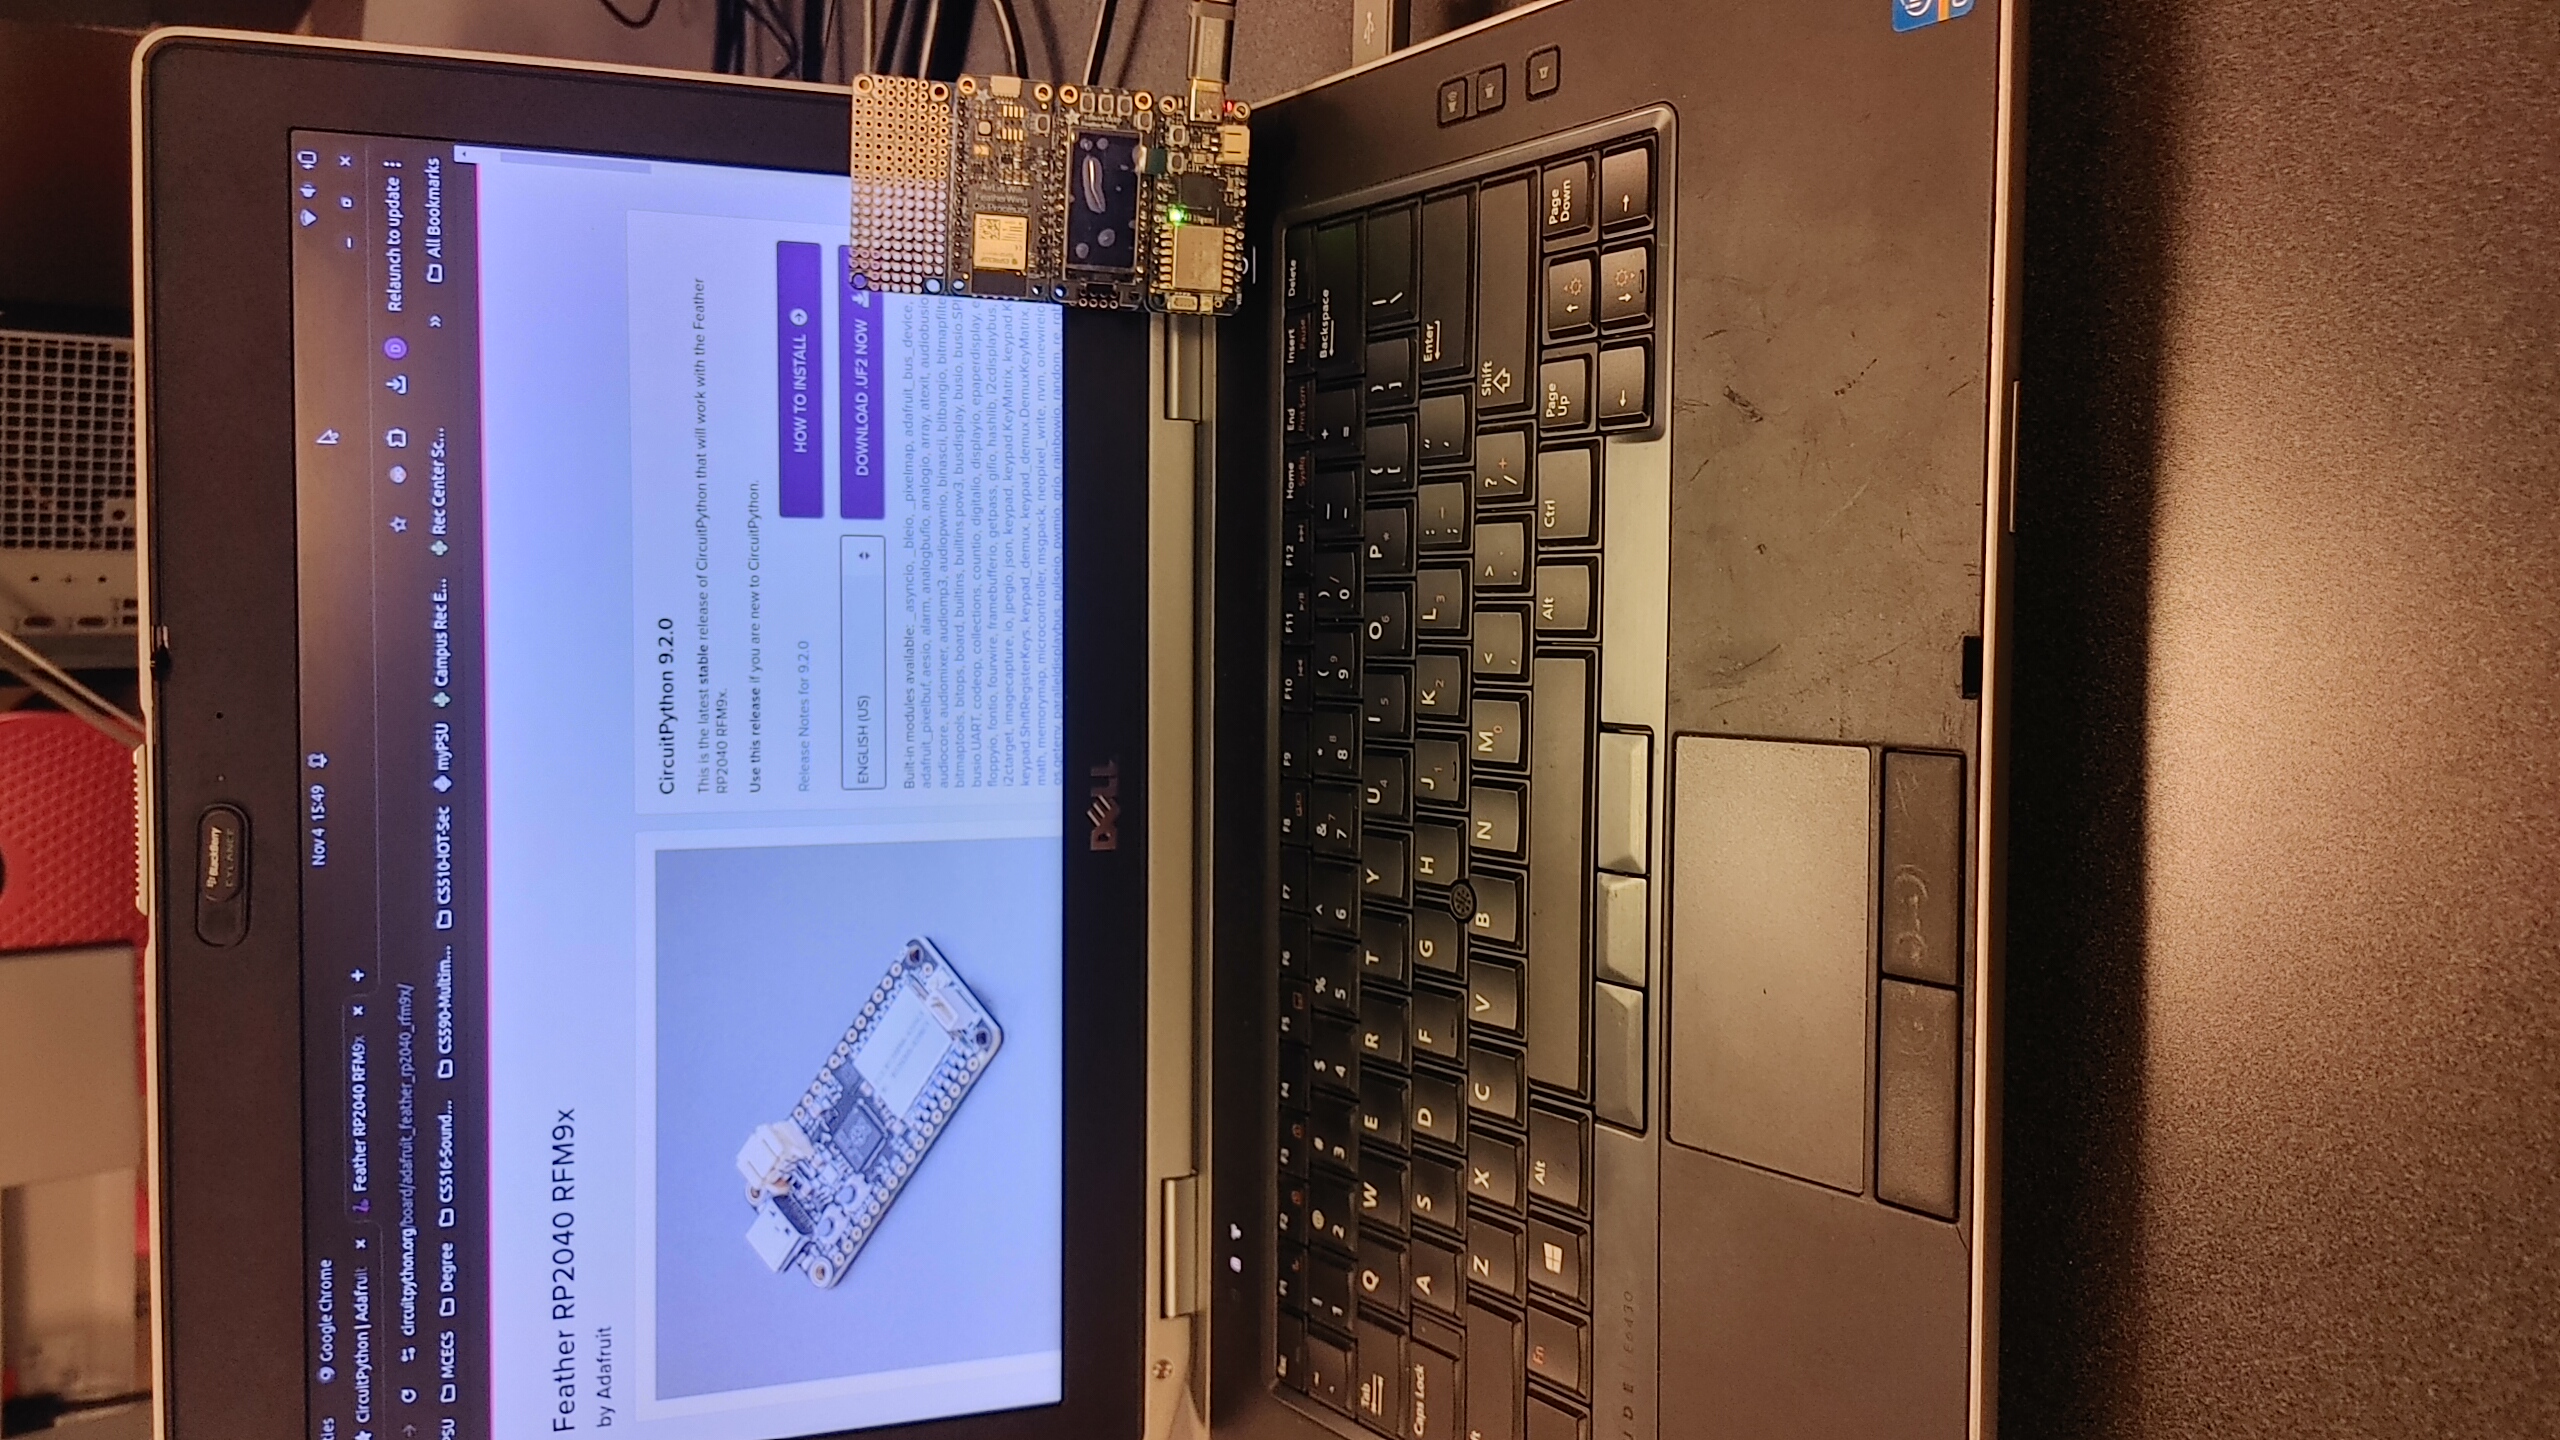
Part 0: Flashing firmware
To begin, I plug in my board to my PC and download the U2F file
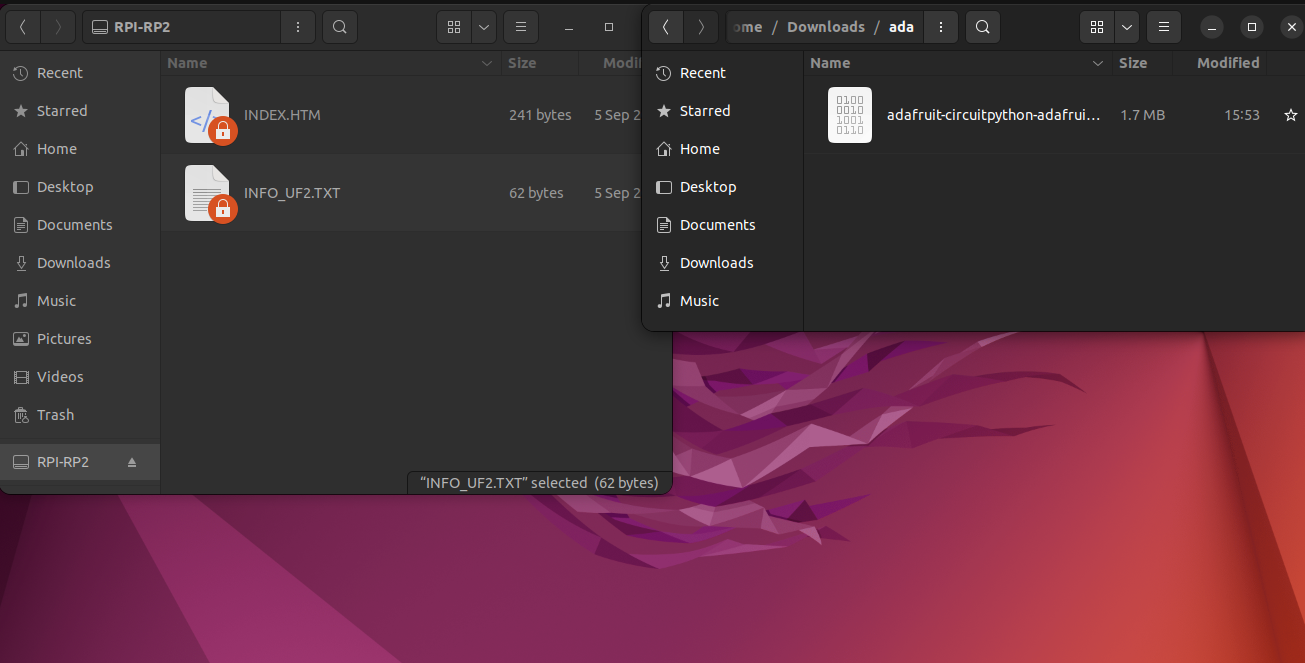
Per the instructions, I then hold the boot button and quickly press the reset button. Shortly after, the storage device appears as avaiable with the name RPI-RPI2
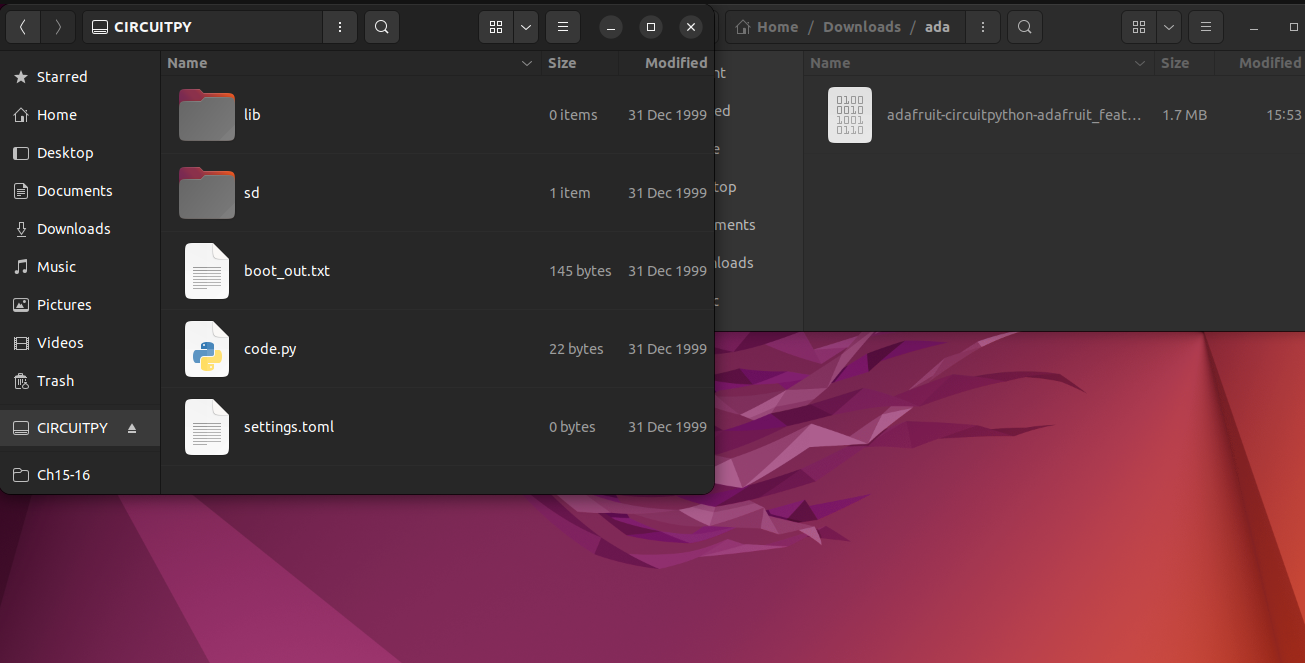
After simply copying the file and waiting a few minutes, the storage device dissapears, and re-appears with the name CIRCUITPY as expected
I can now move on to verify the radio activity functions correctly.
Part 1: Verify Radio
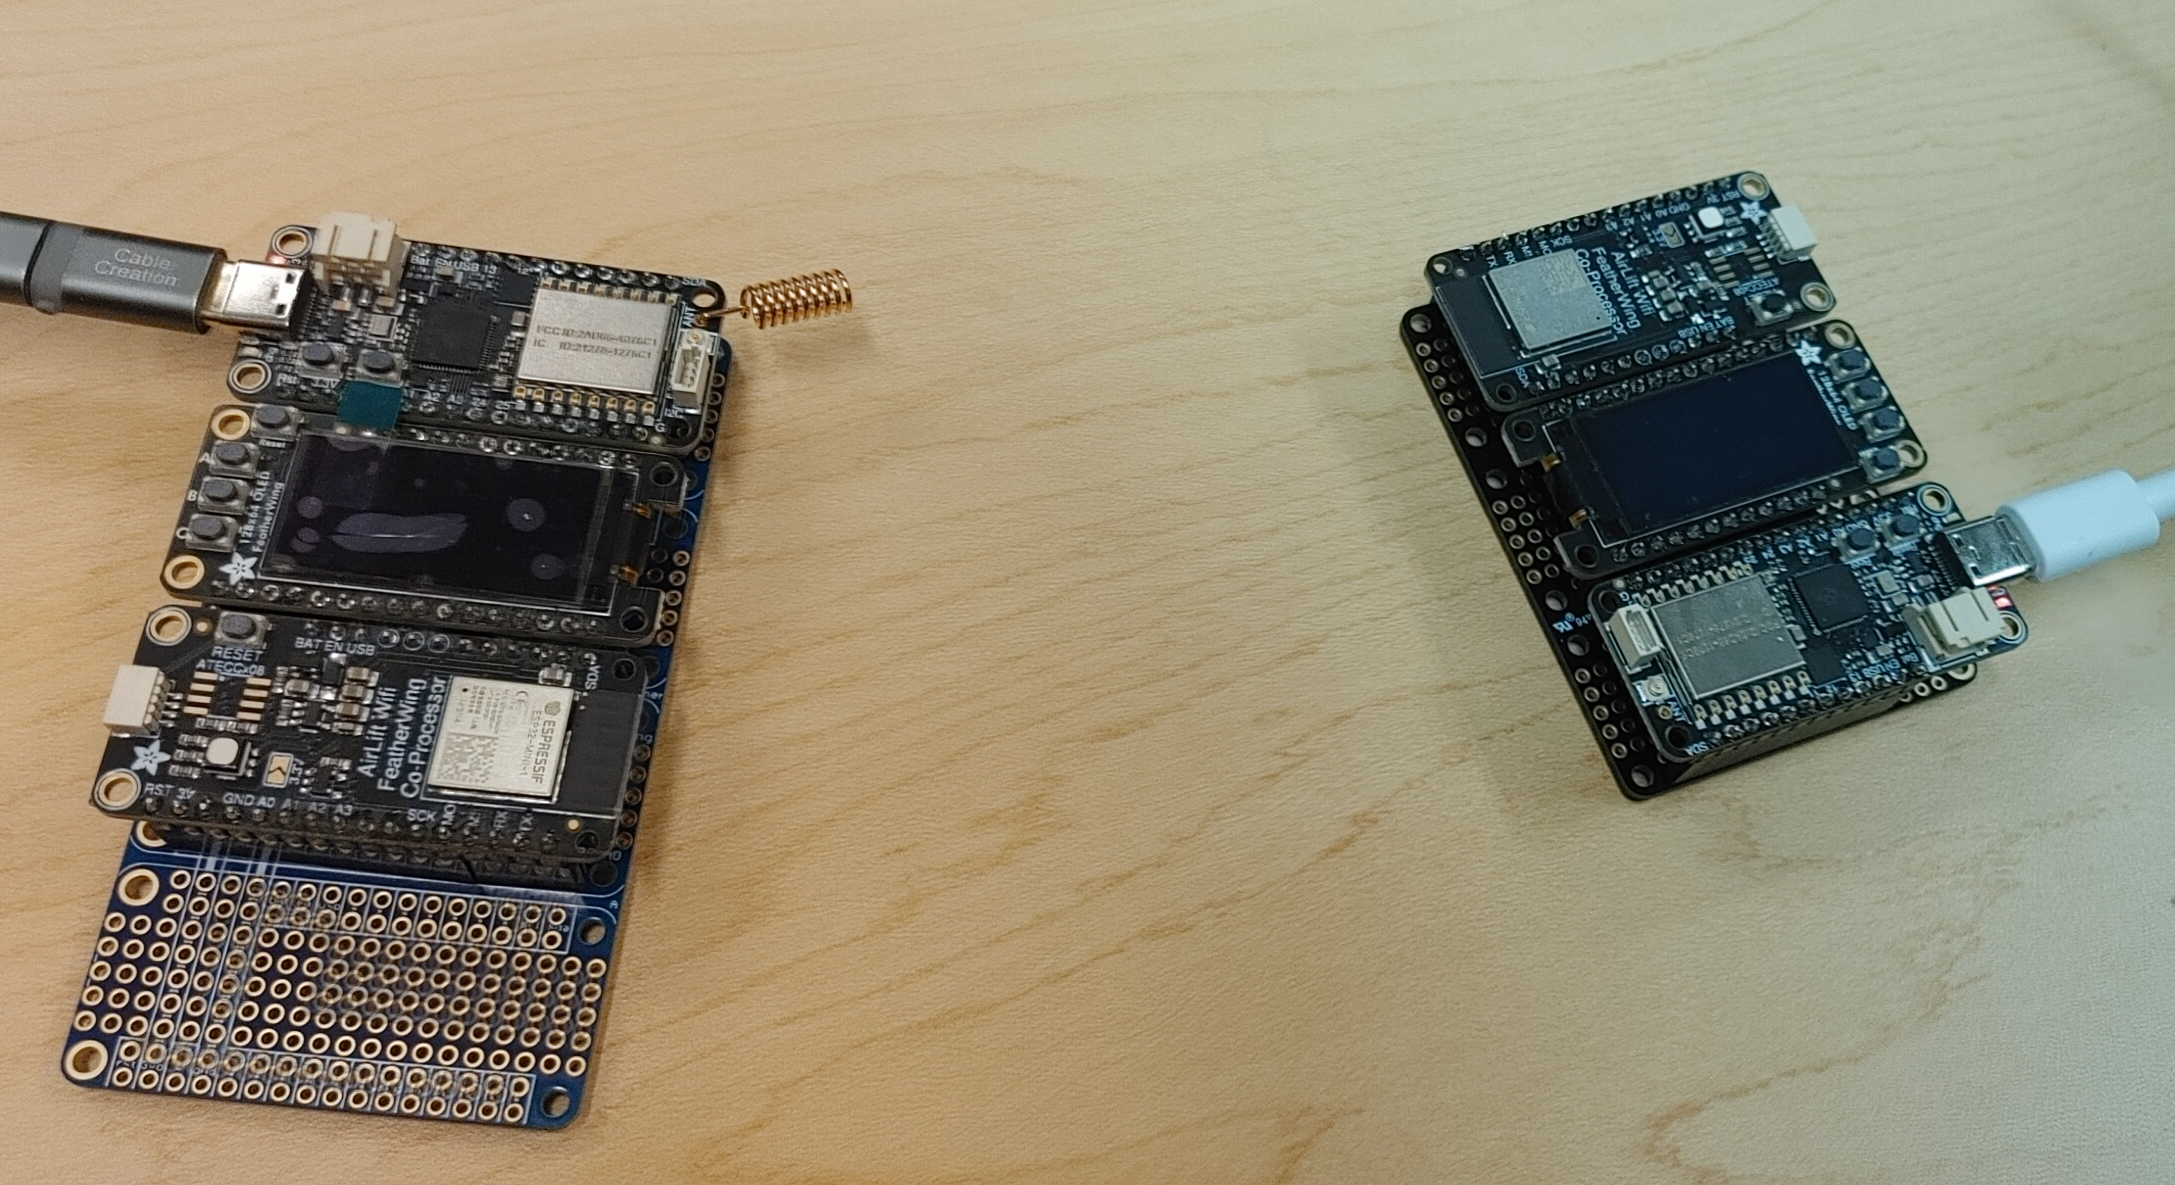
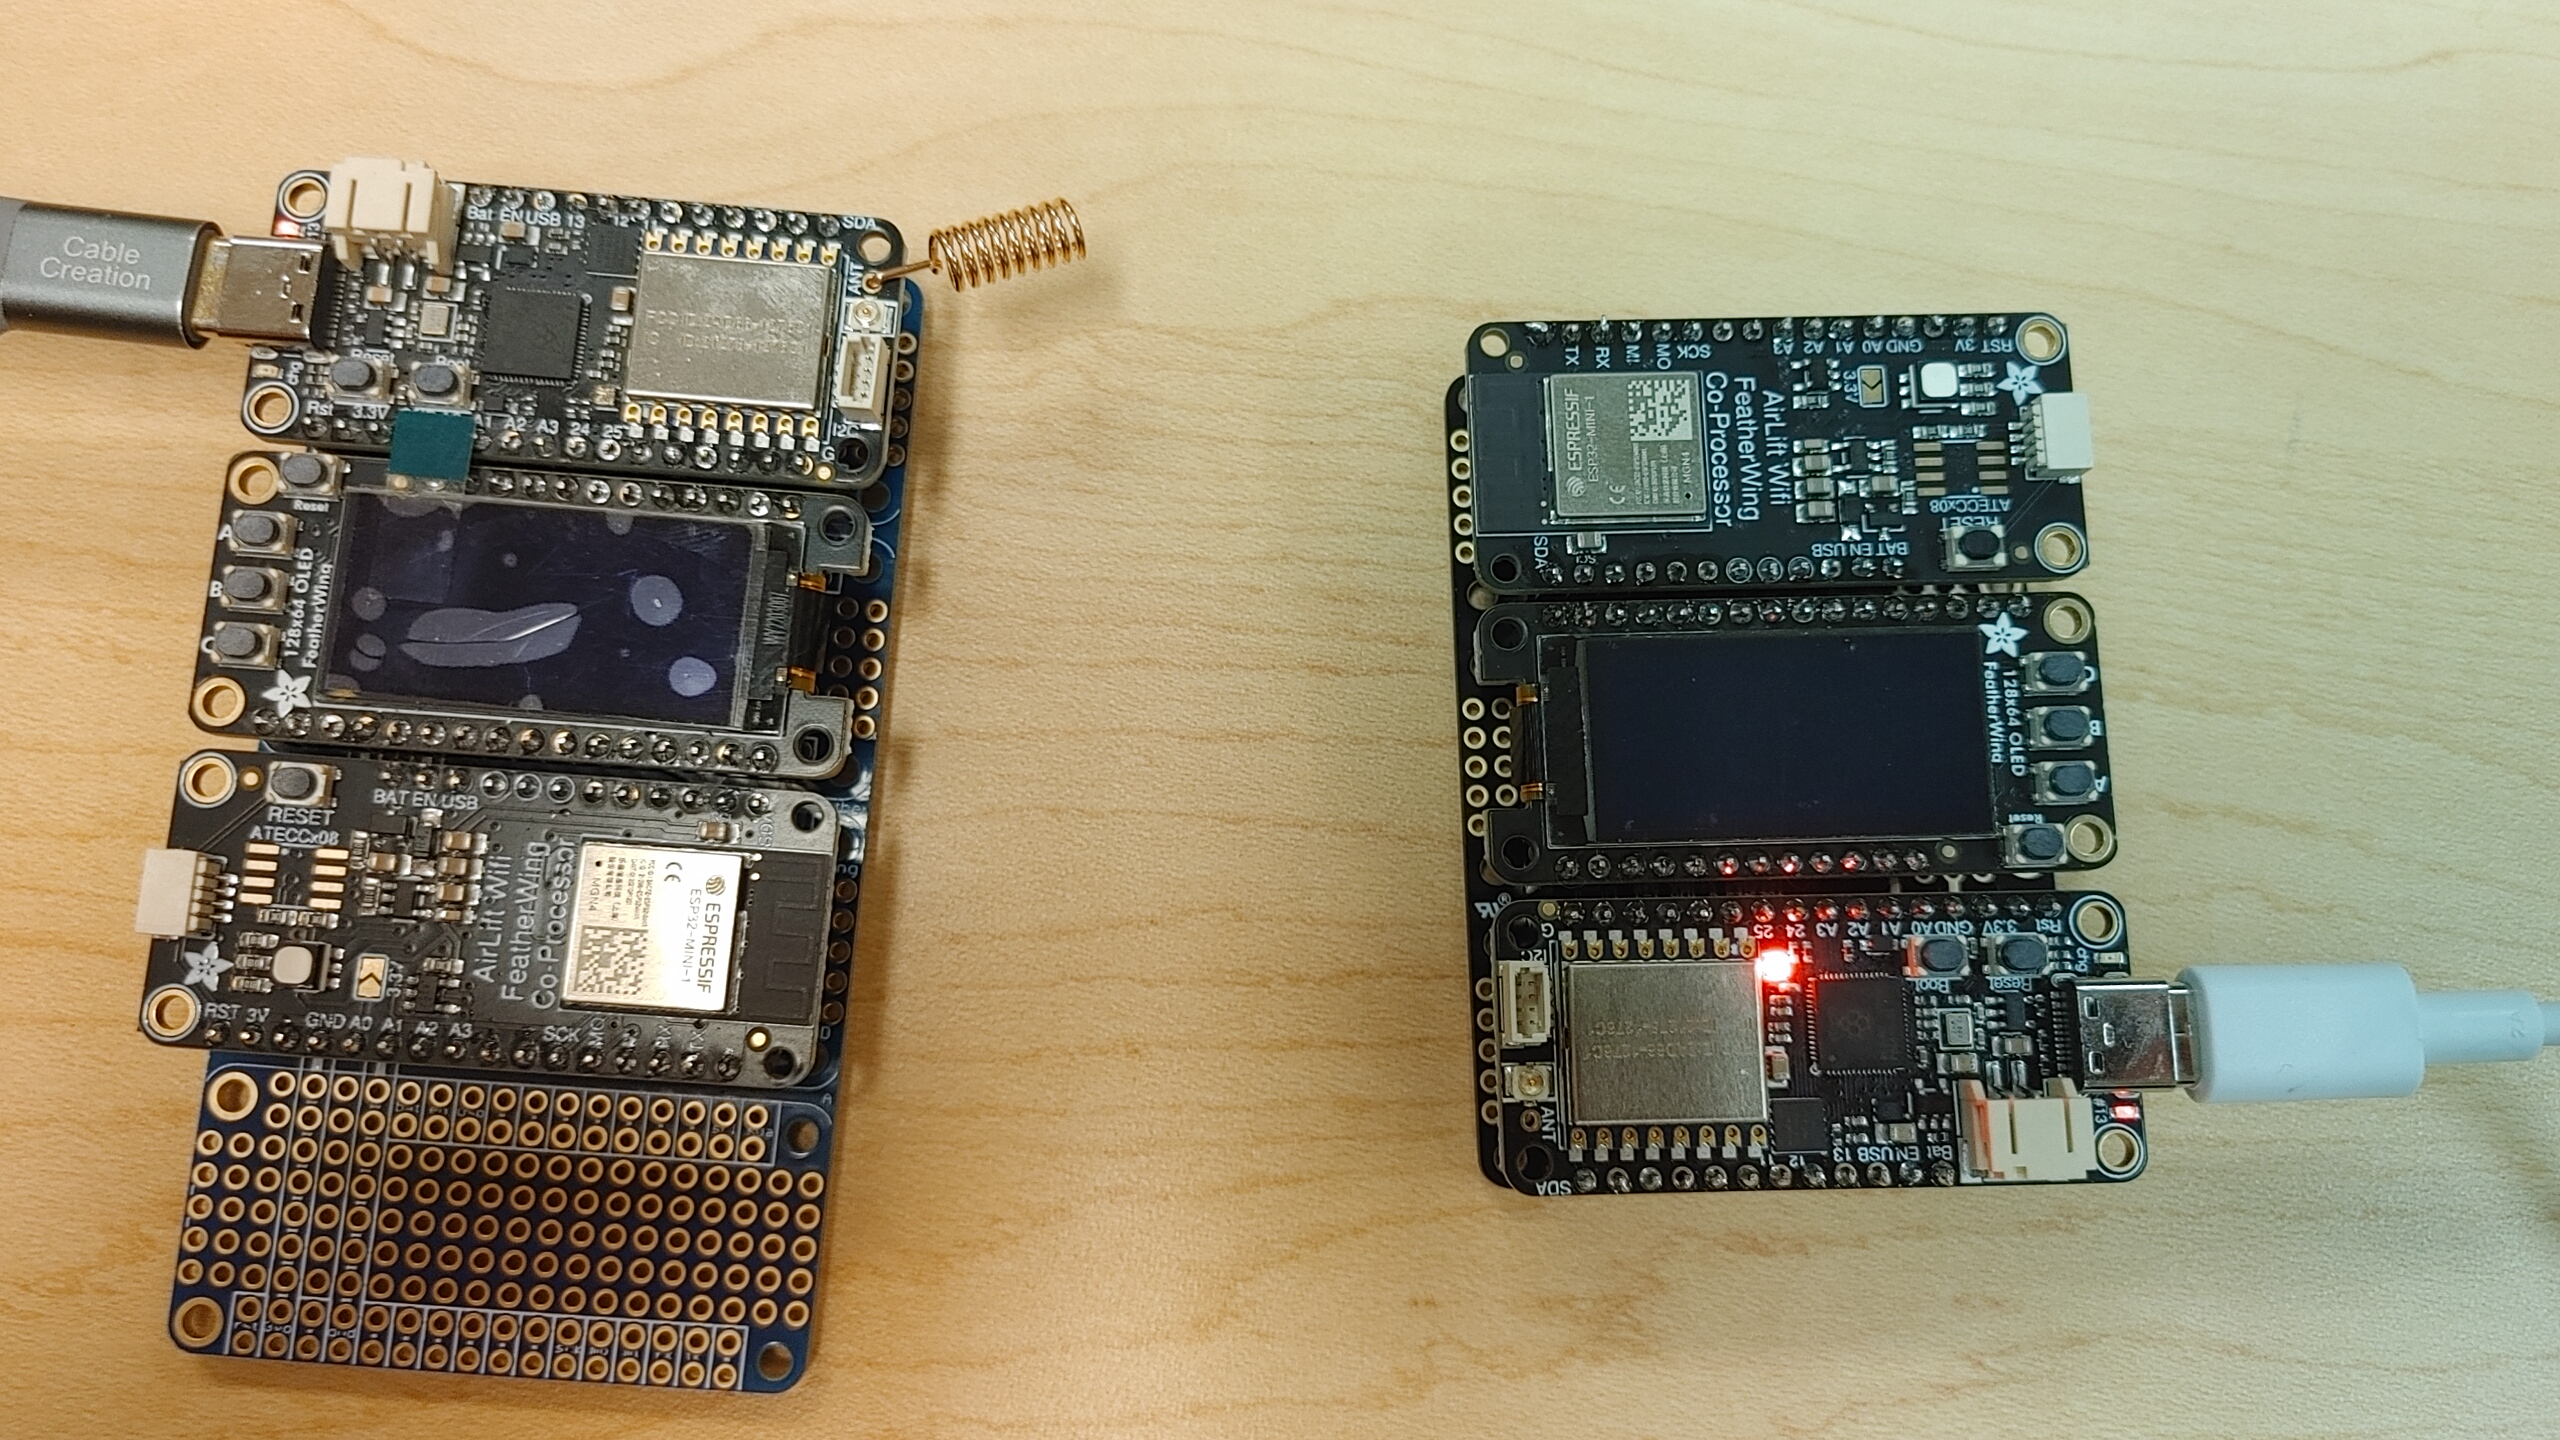
To get started with radio verification, I power on my board with board in proximity with my classmate Gatlin. My board is on the left
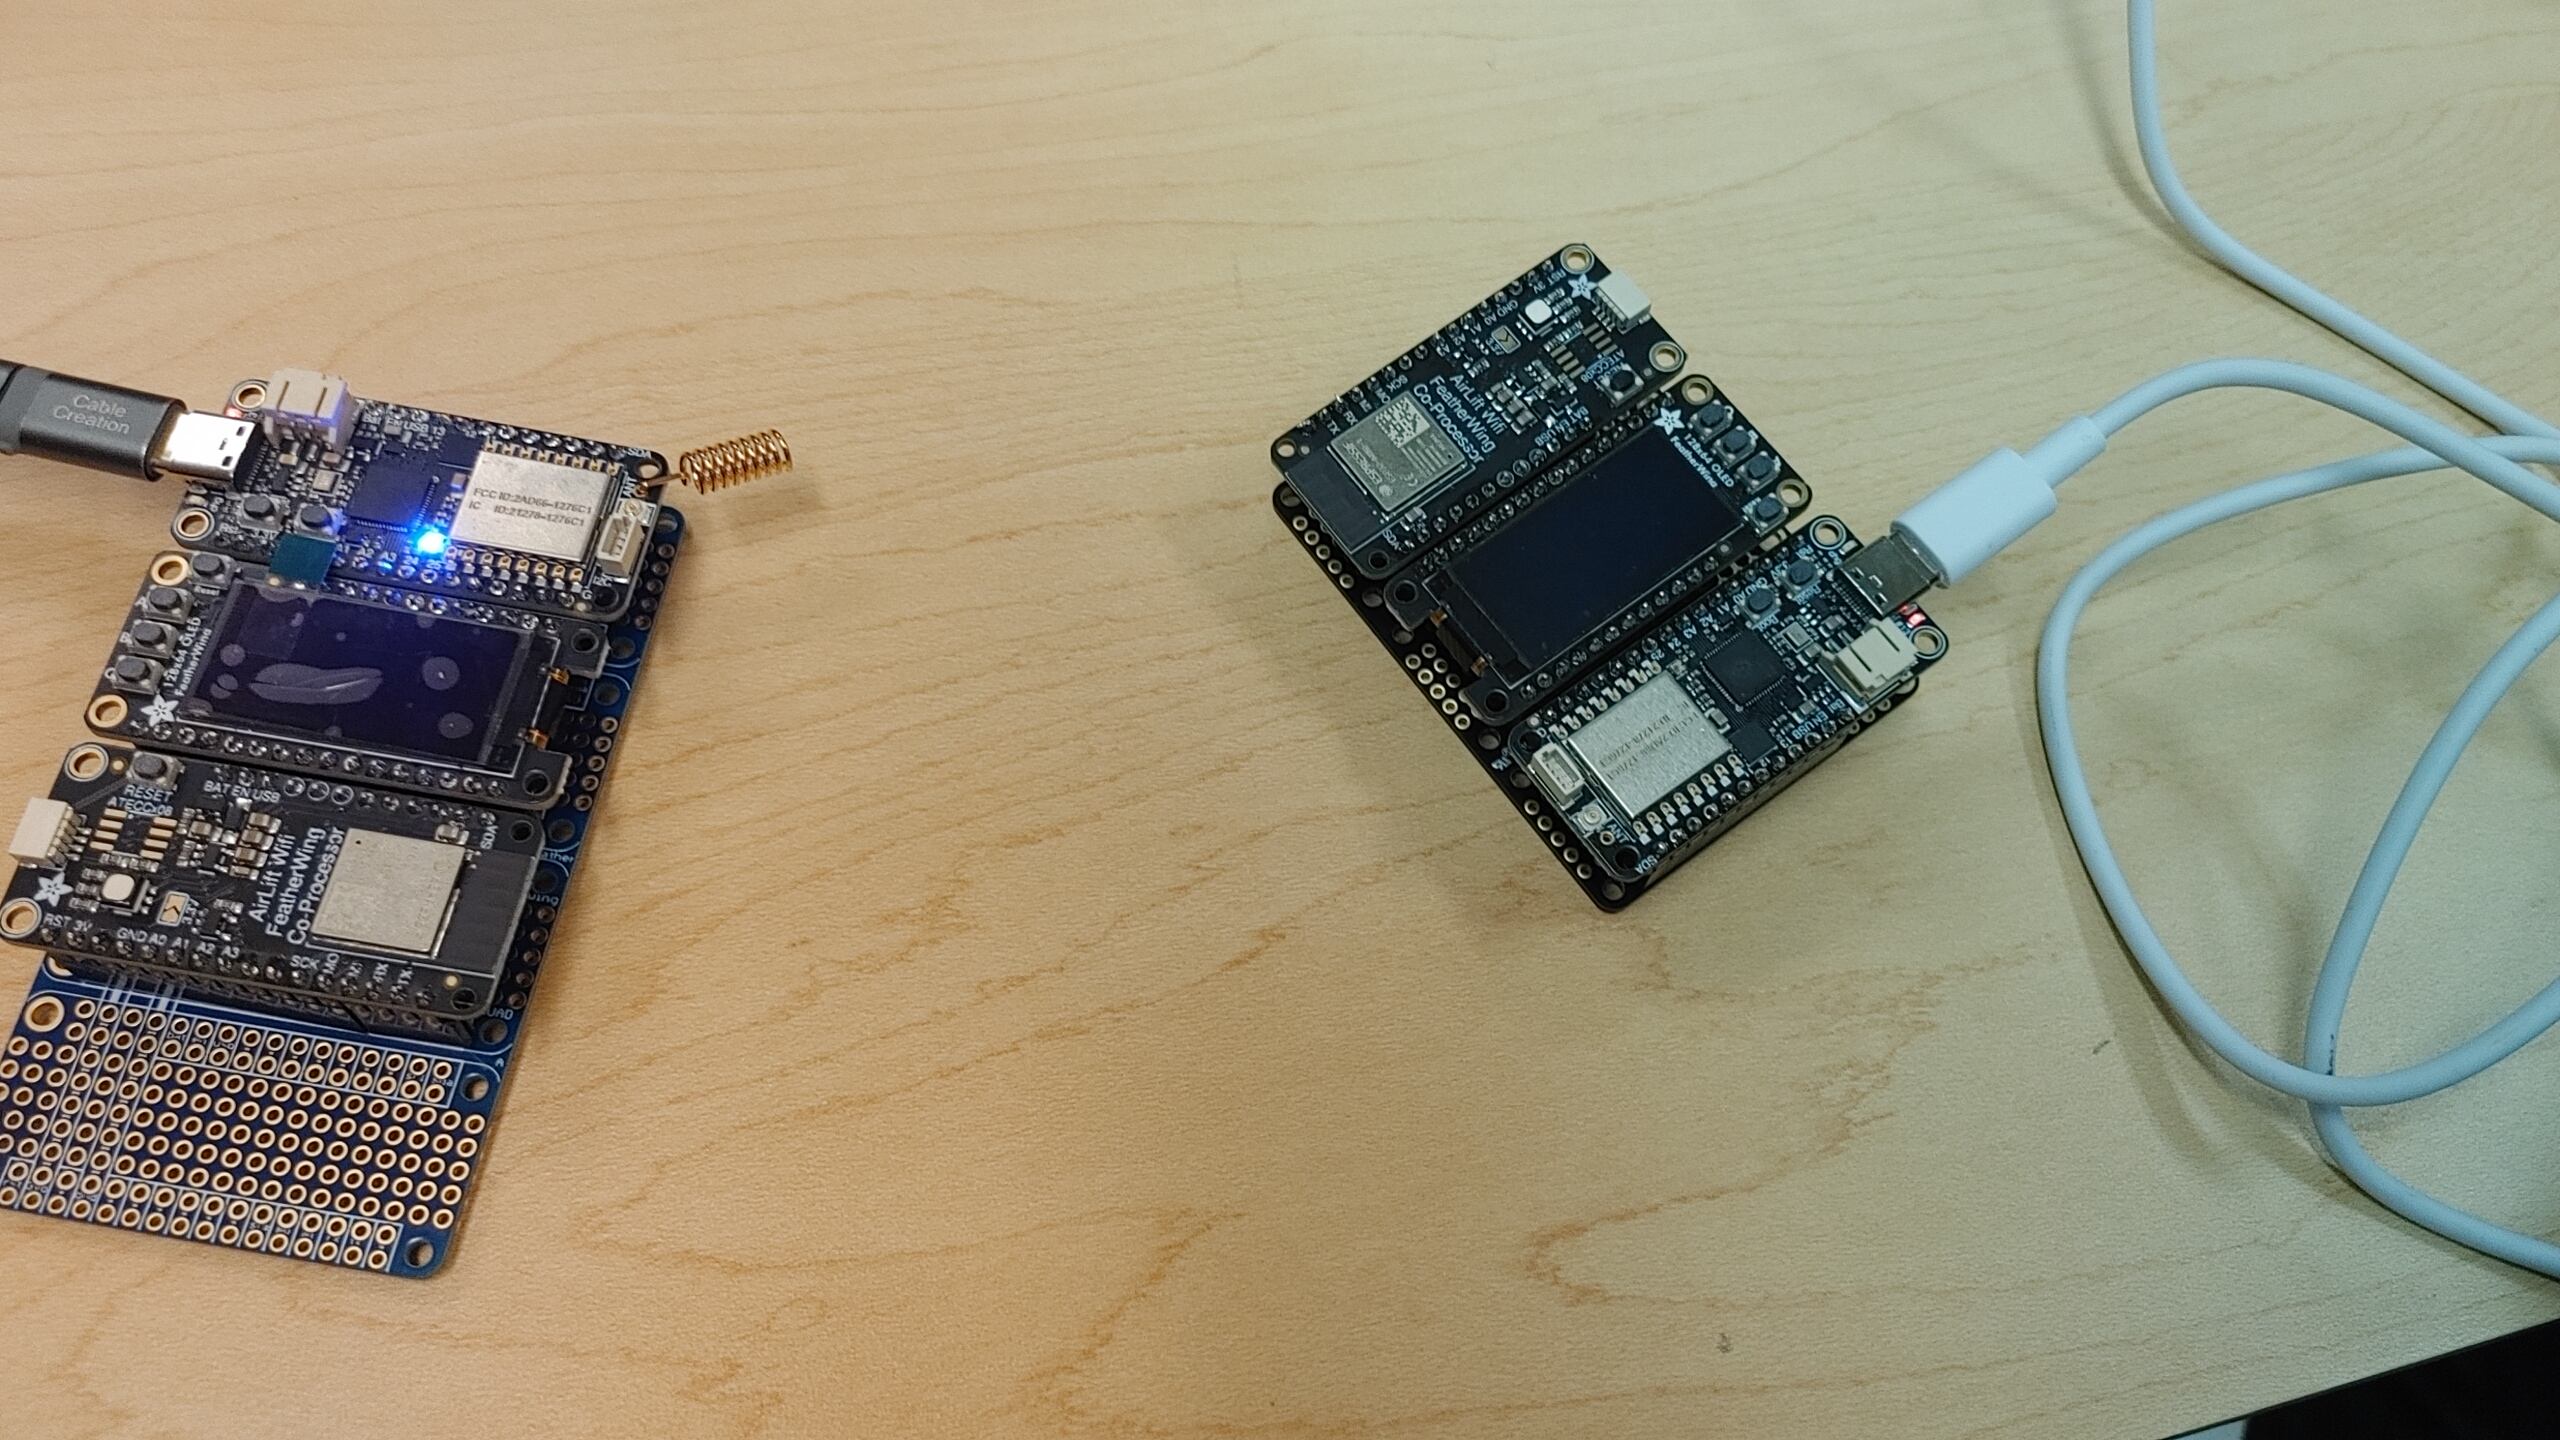
Send
After downloading and copying the send code I test this out by pressing the power button on my device. I can verify success by seeing the other board light up with the LED
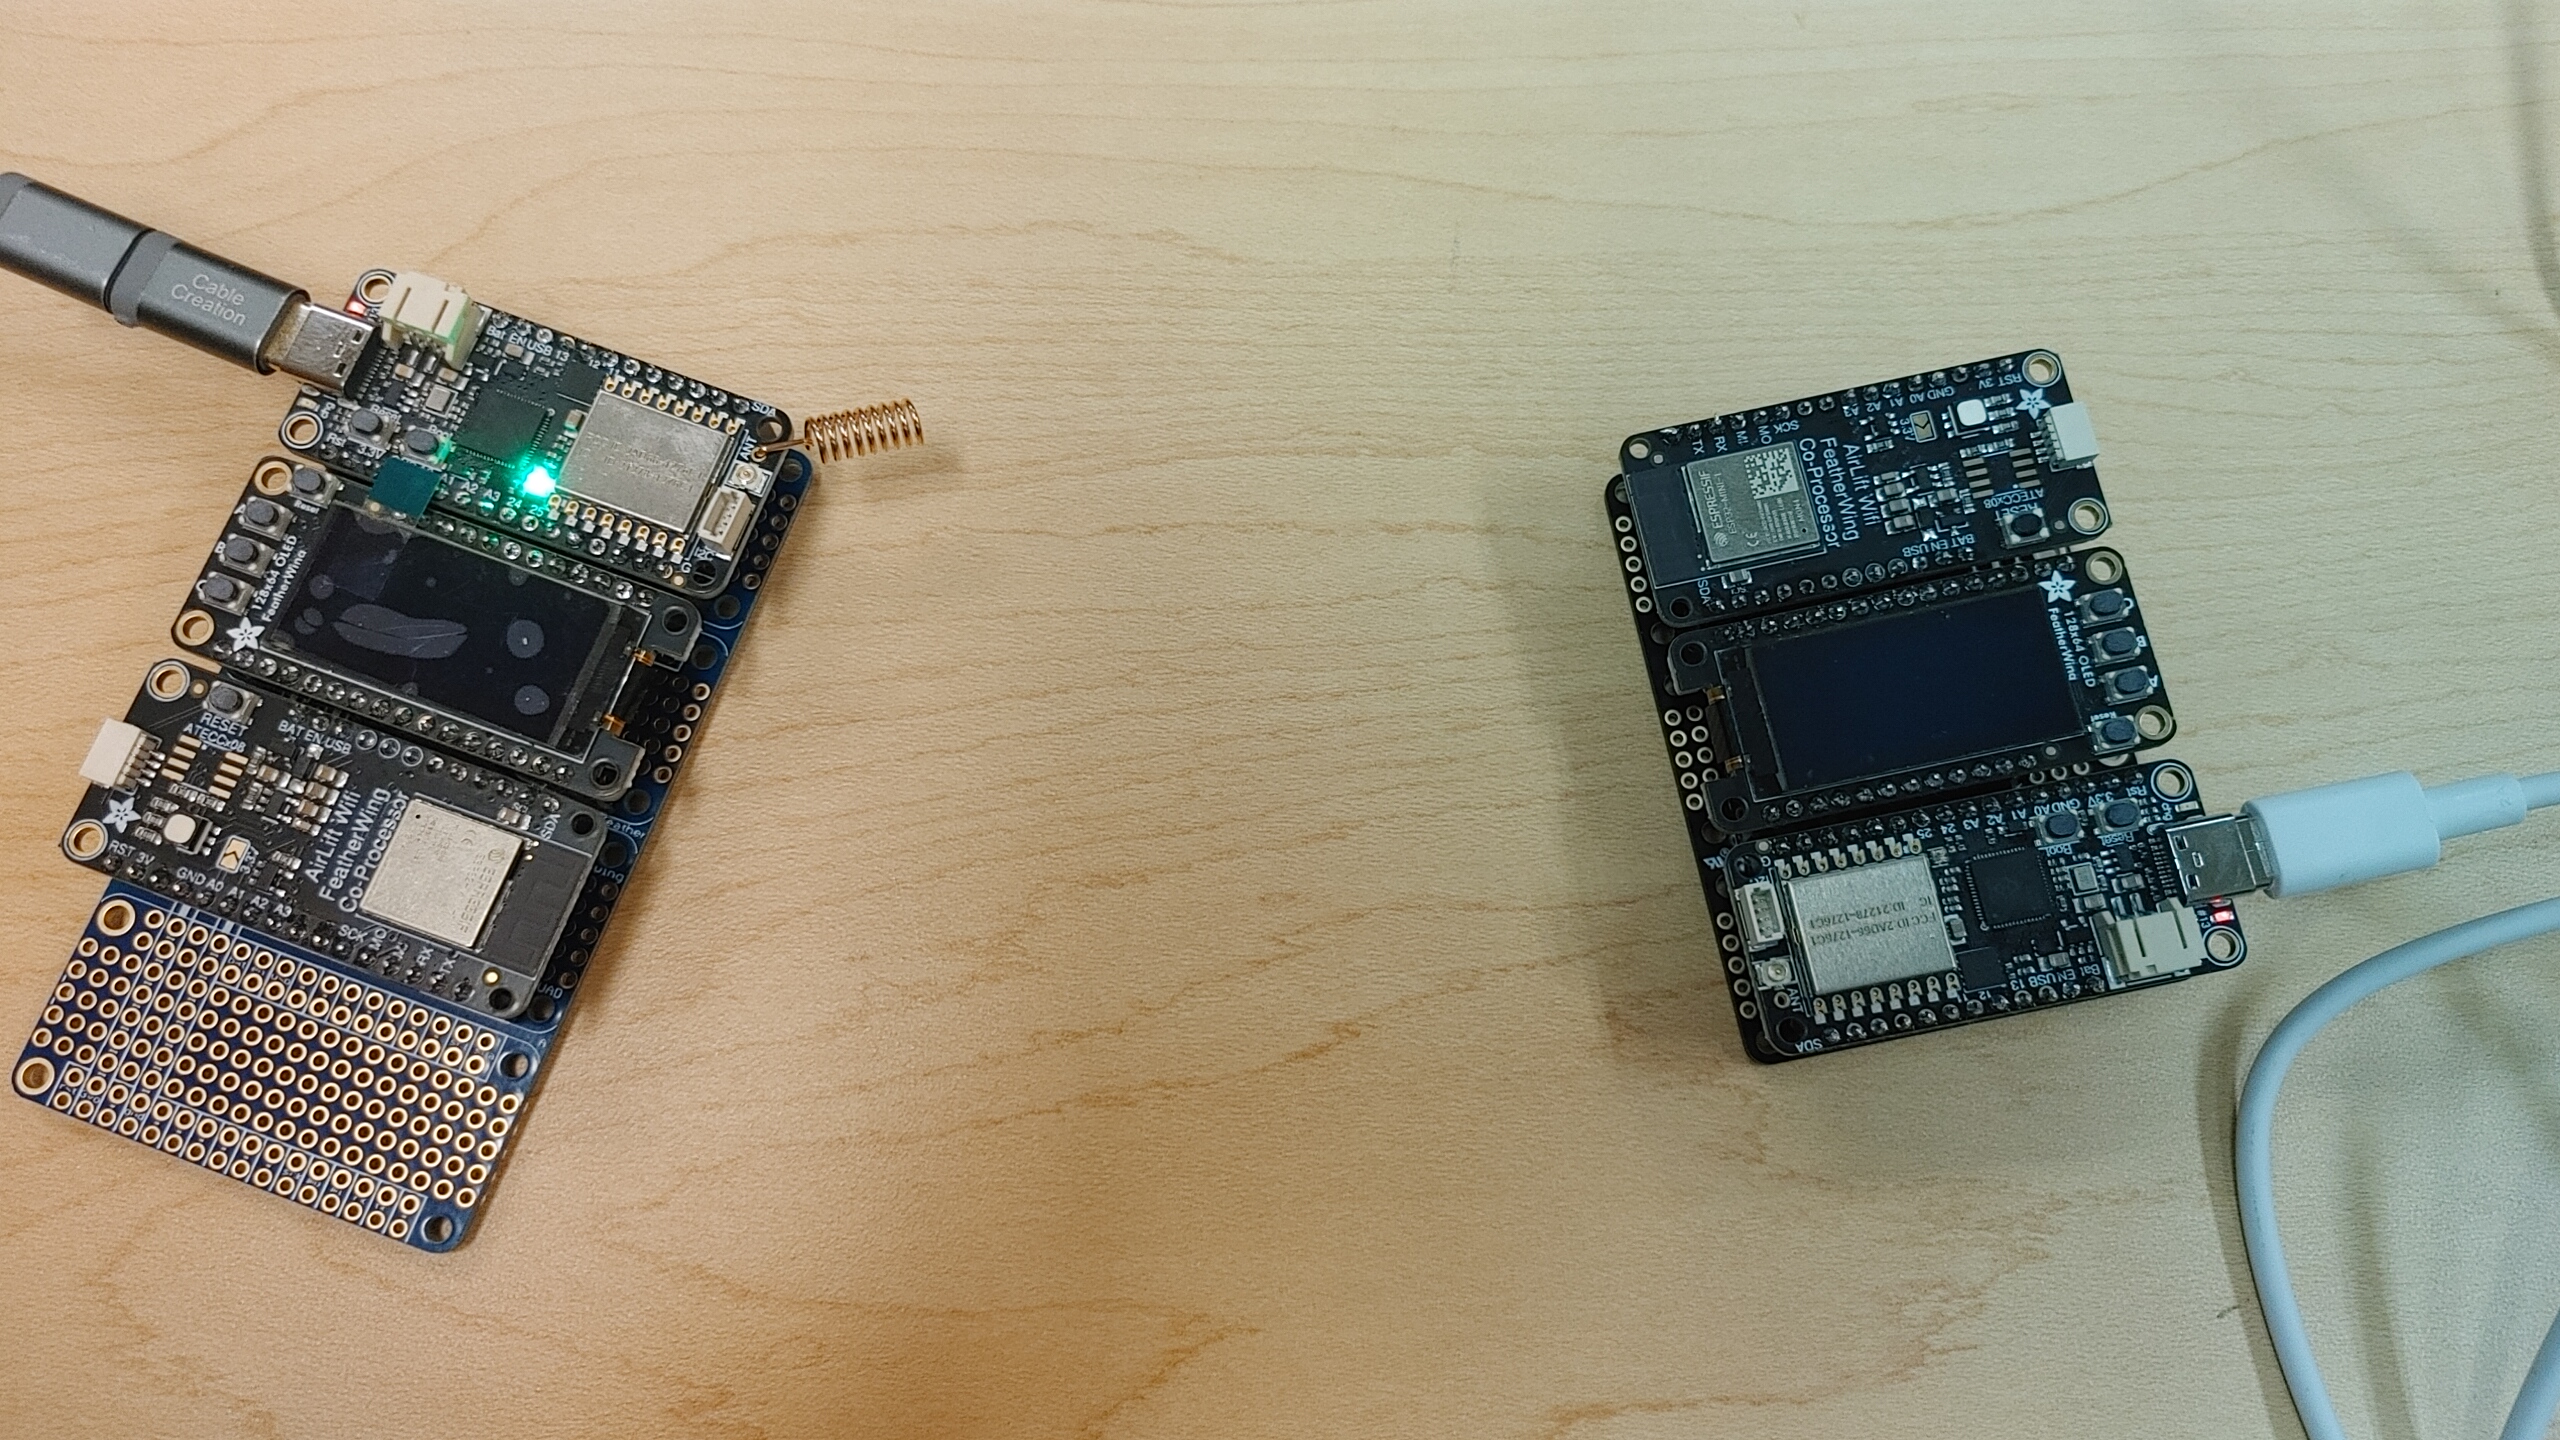
Receive
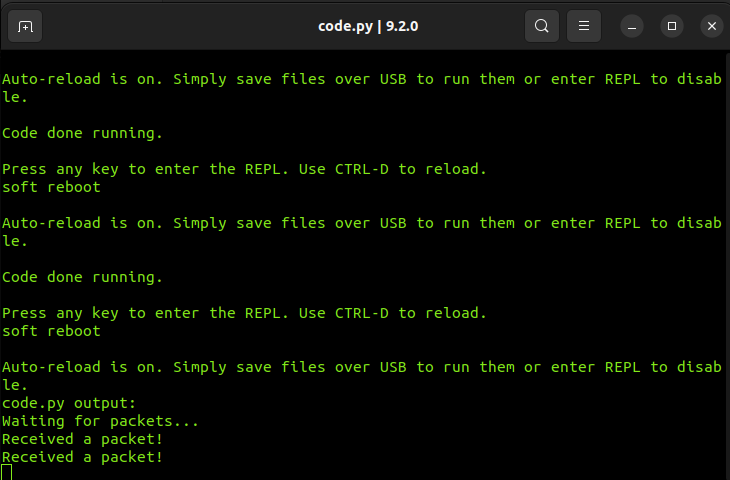
I then copy the receive code to my board and open up the python serial connection (process elaborated on below)
On Gatlin's board, I press the power button a few times. The results here show success, as the LED color changes between red, blue and green, and packets are shown to be received in the python terminal.
Part 2: Serial Console
To verify serial access capabilities with my featherboard, I will be following the linux instrutions provided
Determine the port
With the board connected, only one serial port appears. This is a good start

Connect
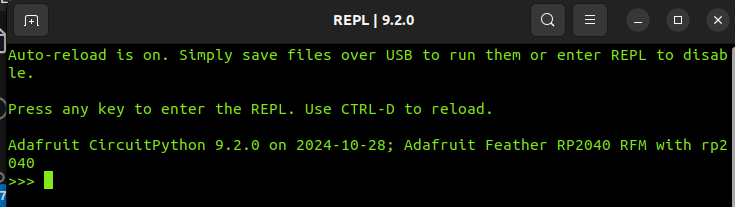
I now run the screen command on the serial port with the baud rate given from the tutorial

This is successfull, and I drop into the circuit python interpreter with ease!
Reflections
The overall process here of interfacing with the RP2040 featherboard and basic interactions with the radio and python interpreter were straightforward. This is convienent compared to my prior experience with embedded controller, and the need to often compile and push lower-level code to build features.