8.3 KiB
Homework 5: Fuzzing
Prelude
The first step I took for this asignment was setting up the docker container. This was straightforward with the provided instructions
Part 1 - Tutorial
Step-0
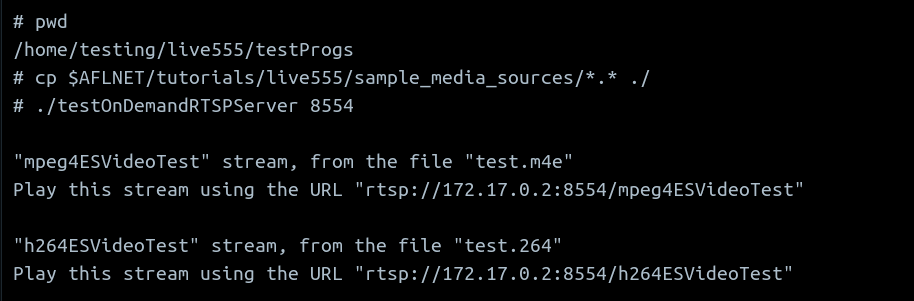
Here, I have followed the instructions the run the sample RTSP client and server
The server running is shown here
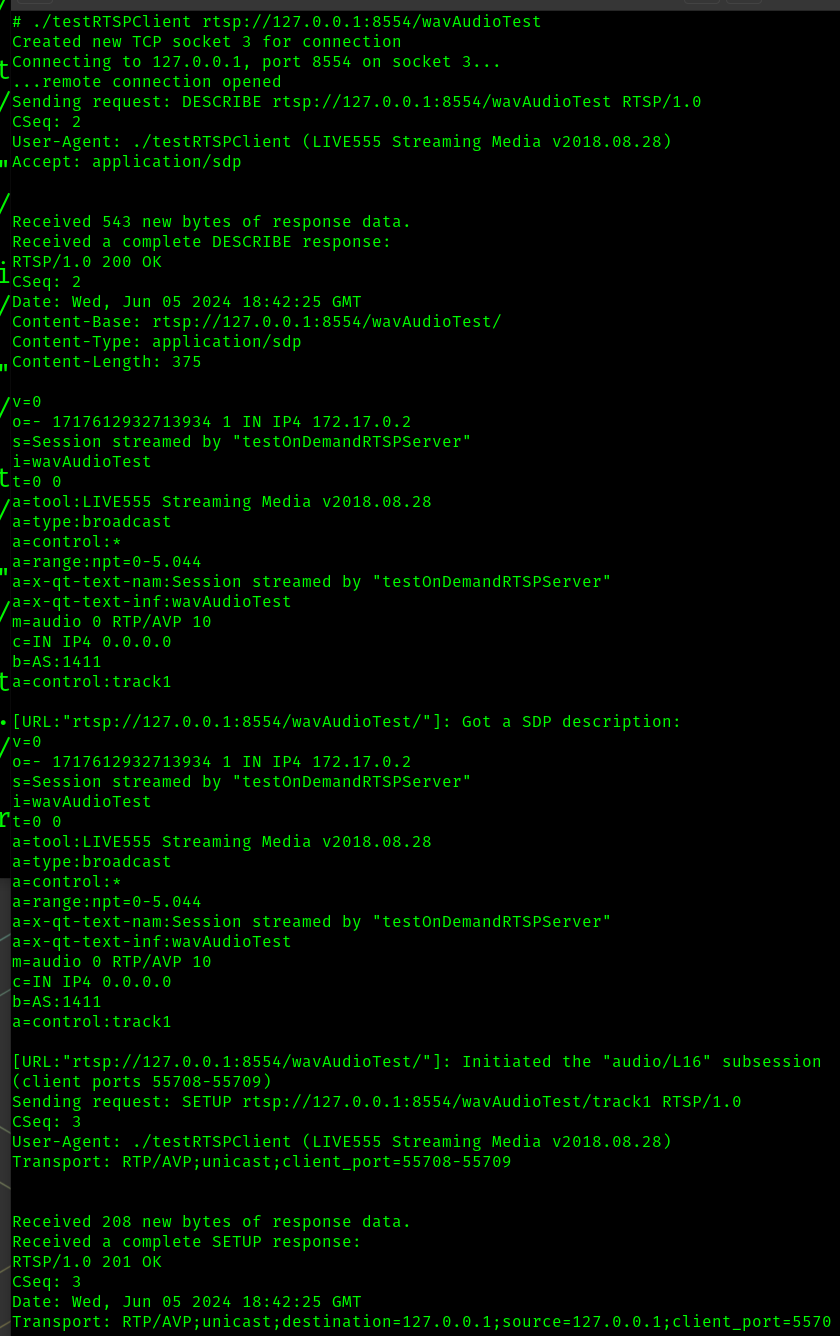
In another terminal, we run the sample client
Step-1. Prepare message sequences as seed inputs
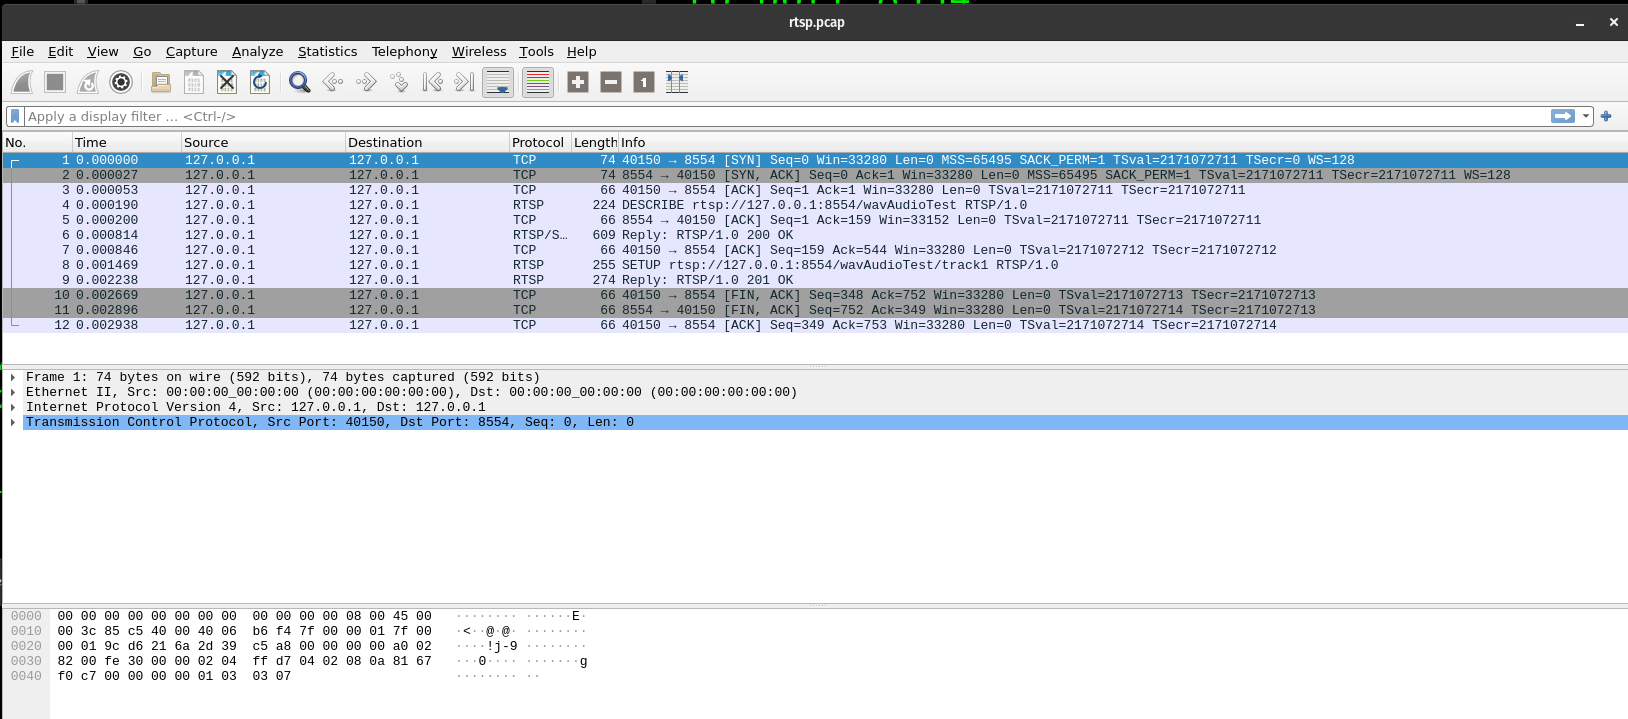
At this point, we have the server and client running. The next step is to install TCP dump, and open it up on a 3rd terminal window. We can now restart the client and capture some traffic
As we can see, with this approach we have captured 24 packets

Using docker cp I have copied that file rtsp.pcap to my local machine, and also have included it at ./part1/rtsp.pcap
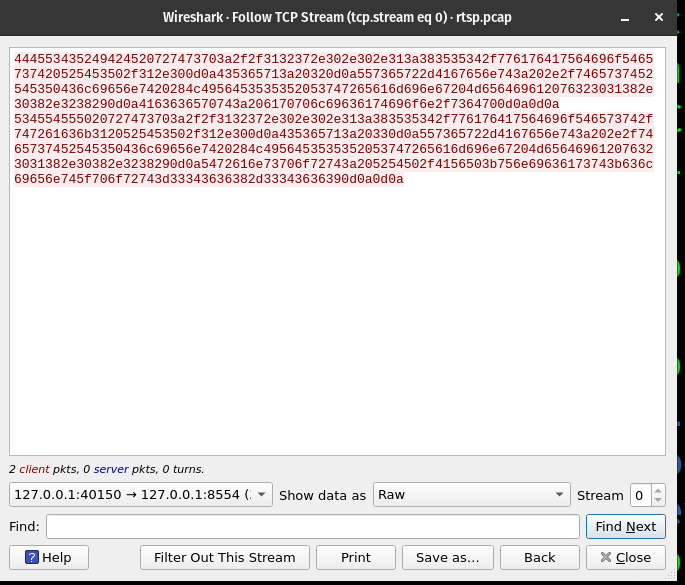
Lets take a look at this file with wireshark rtsp.pcap
Following the instruction, we can save the raw TCP stream of the request messages to rtsp_requests_wav.raw
Step-2 Modifications
As understood in the Step 0 instructions, we have already applied the ceeb4f4 patch to make fuzzing more effective.
Step-3 Fuzzing
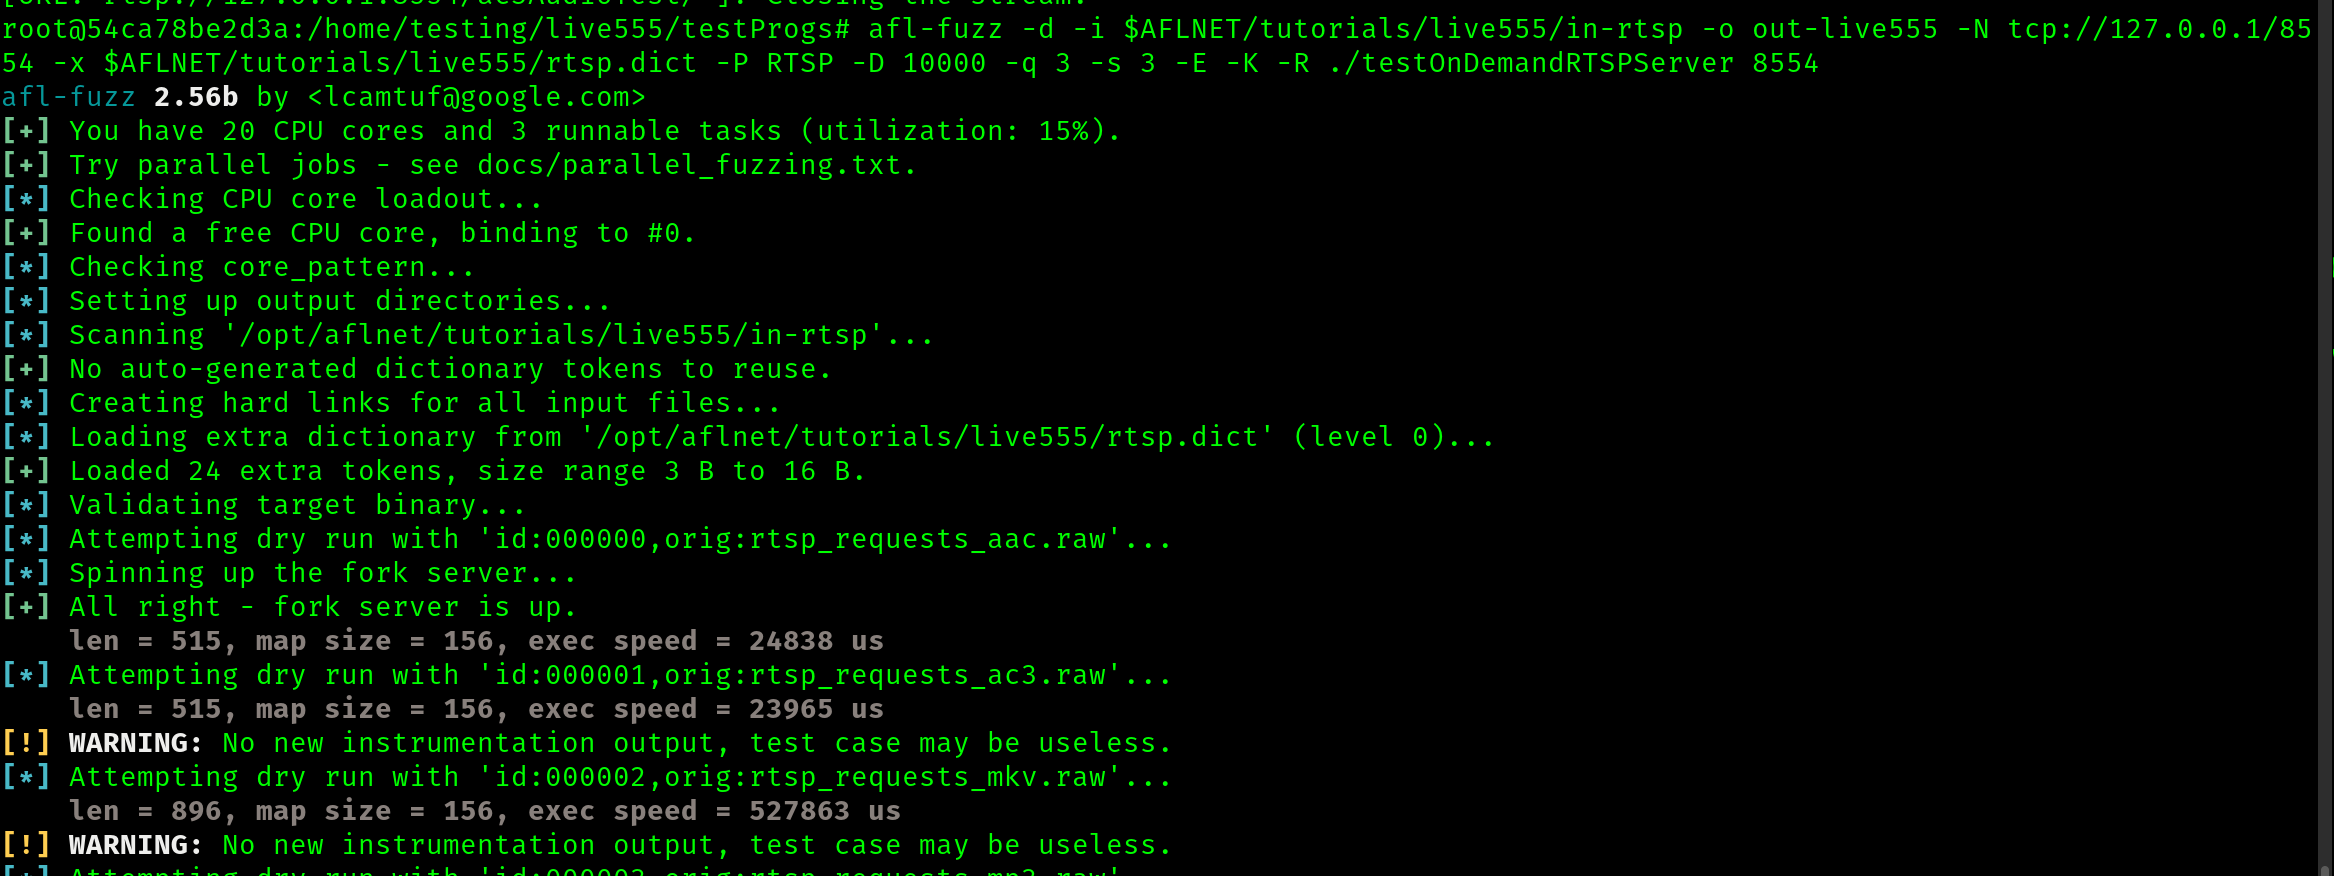
We begin the fuzzing process running the supplied command.
afl-fuzz -d -i $AFLNET/tutorials/live555/in-rtsp -o out-live555 -N tcp://127.0.0.1/8554 -x $AFLNET/tutorials/live555/rtsp.dict -P RTSP -D 10000 -q 3 -s 3 -E -K -R ./testOnDemandRTSPServer 8554
It seems off to a good start, and I will let this run for some time and check back later. Due to the time investment of this fuzzing effort, I will use the provided seed corpus and not the one I generted in step 1. Though I am mostly confident I followed step 1 correctly, I do not wish to find out in a day that I may have made a mistake.
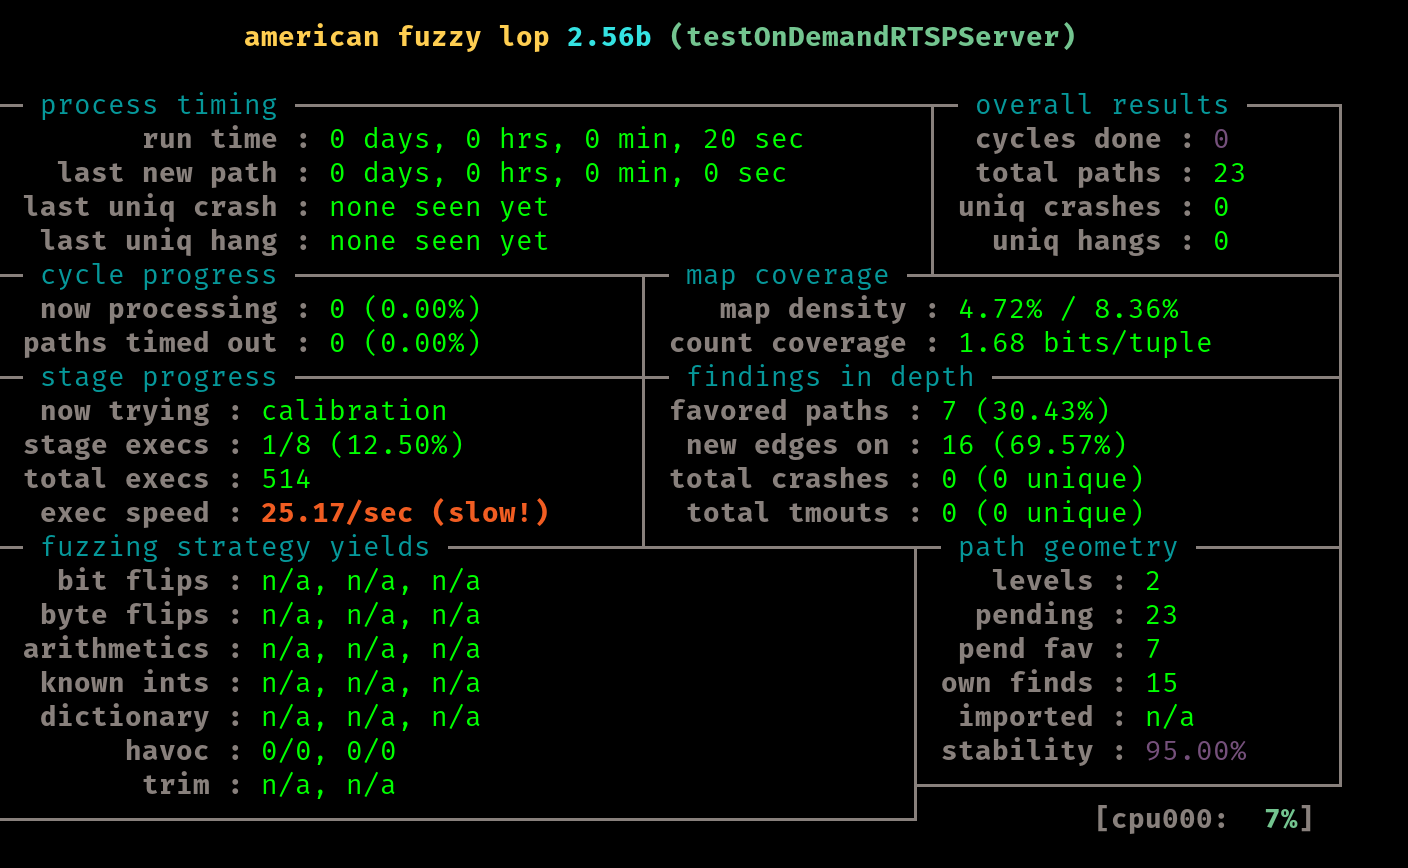
After about 44 hours of running this test it is time to move on. We notice we have 40 unique craches at this point, and the last one found was about 3 hours ago

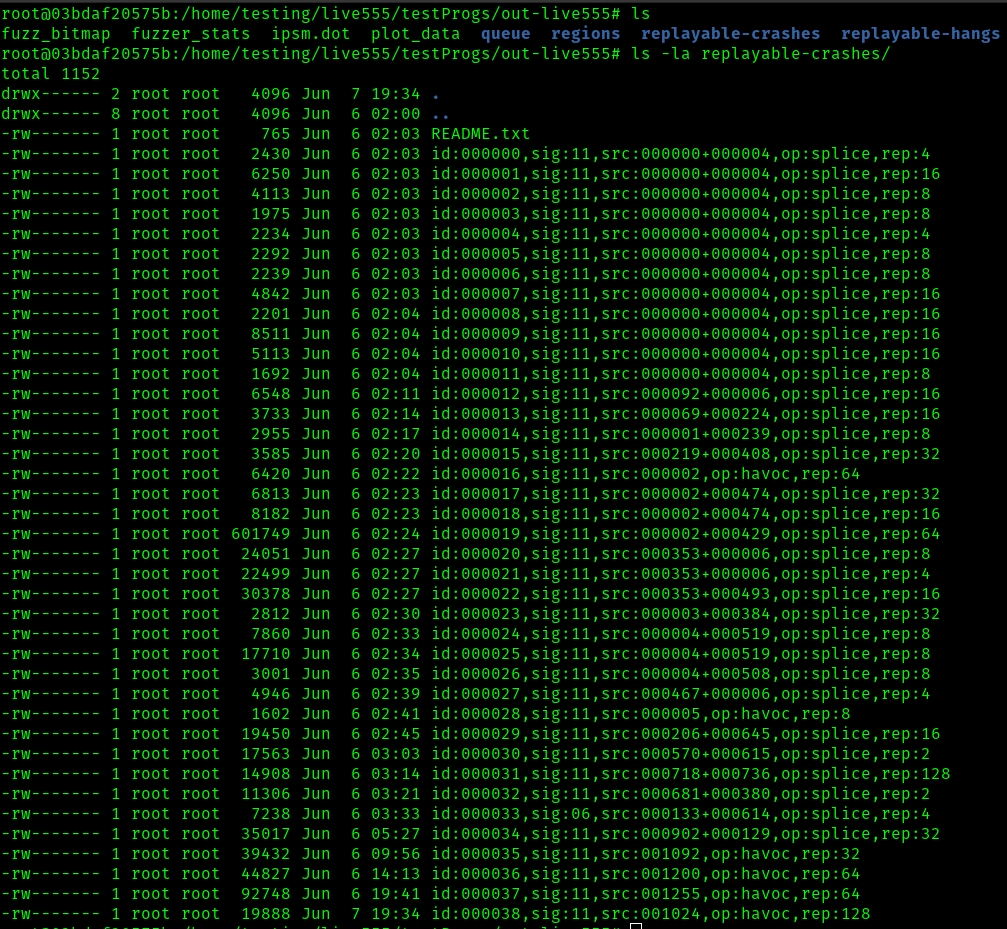
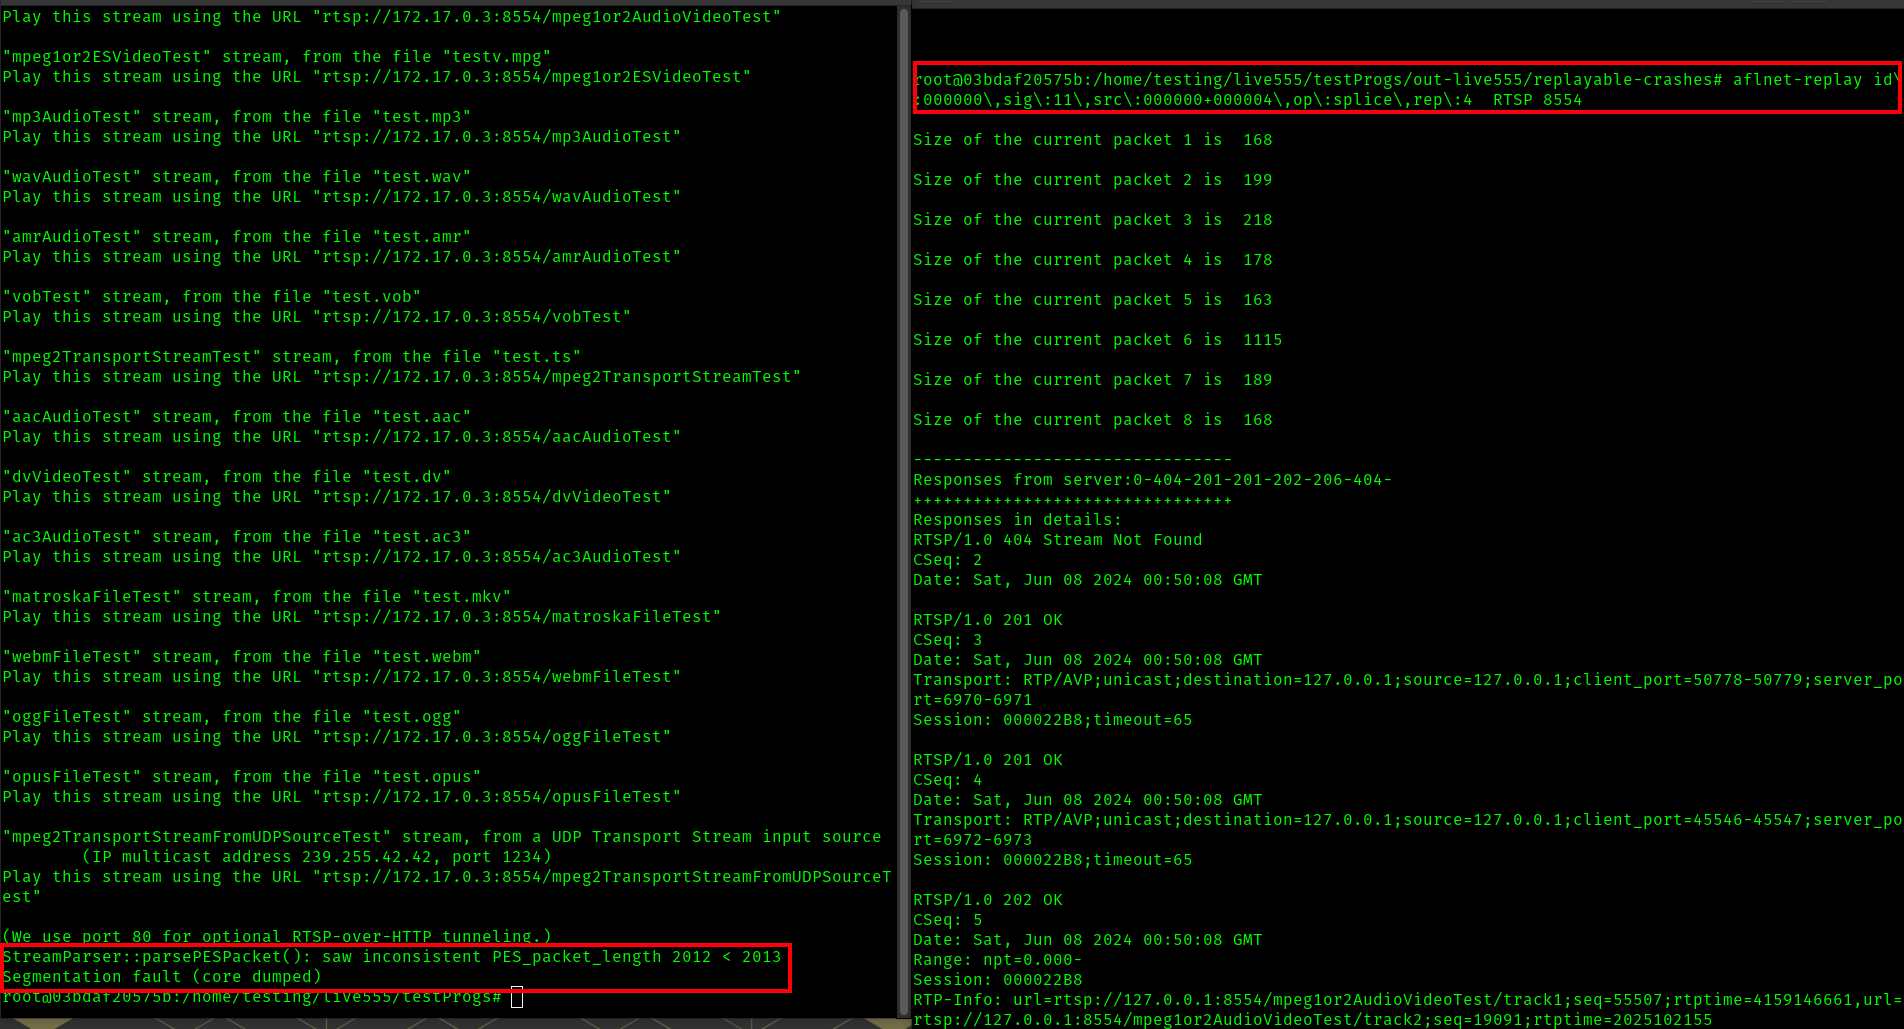
These crashes can be found in the replayable-crashes directory of our run
Step-4 Reproducing
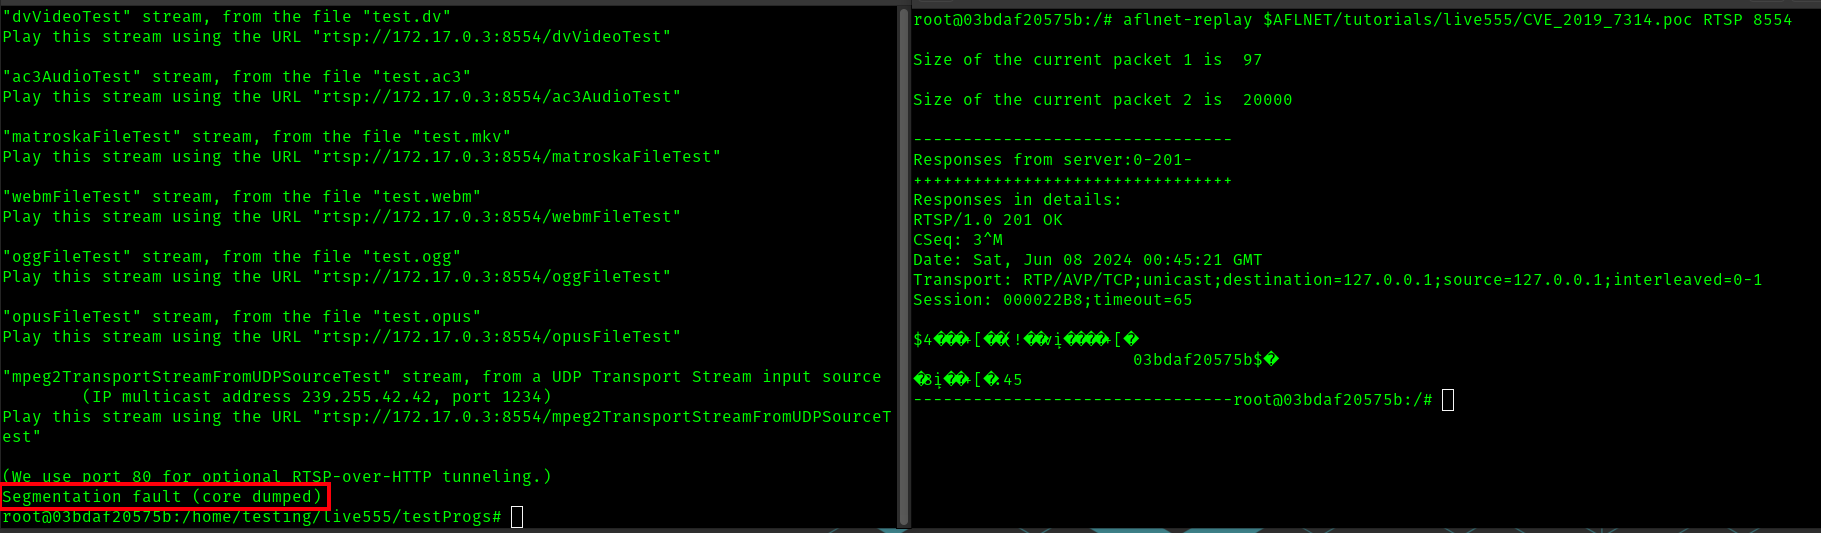
As noted in the instructions, with afl-replay we can replay the crashing client input on the running test server, as shown with the provided example input CVS_2019_7314.poc
Here is another example of performing and aflnet-replay with one of the replayable crashes results I found to again crash the RTSP server
Part 2 - Our own example
I will run through this exercise again choosing my own example from the other provided tutorials in this container. In the $AFLNET/tutorials directory, we see some options

I will choose to focus on the ippsample, which seems to be a fuzzing exercise for the Internet Printing Protocol (IPP). Included in this tutorial is a README, so I now will show my progress following along the steps provided there.
Step-0. Server compilation & setup
I'll run the following bash commands to ensure I am fuzzing the correct version
export WORKDIR=$(pwd)
cd $WORKDIR
# Install requirements
sudo apt-get -qq update
sudo apt-get install -y build-essential autoconf avahi-daemon avahi-utils cura-engine libavahi-client-dev libfreetype6-dev libgnutls28-dev libharfbuzz-dev libjbig2dec0-dev libjpeg-dev libmupdf-dev libnss-mdns libopenjp2-7-dev libpng-dev zlib1g-dev net-tools iputils-ping vim avahi-daemon tcpdump man curl git
# Clone ippsample repository
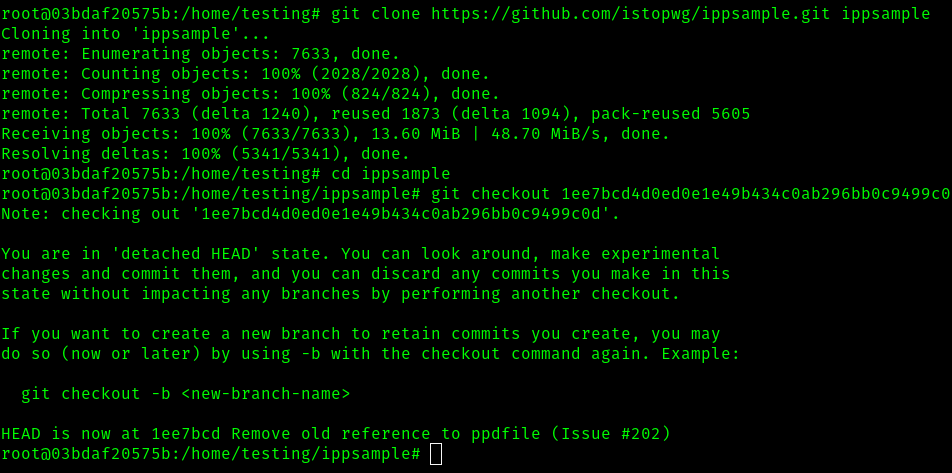
git clone https://github.com/istopwg/ippsample.git ippsample
# Move to the folder
cd ippsample
# Checkout a specific version
git checkout 1ee7bcd4d0ed0e1e49b434c0ab296bb0c9499c0d
# Compile source
CC=$AFLNET/afl-clang ./configure
make clean all
At this point, I've installed the packages, cloned the repository, and checked out the designated commit
Running the make command has also worked
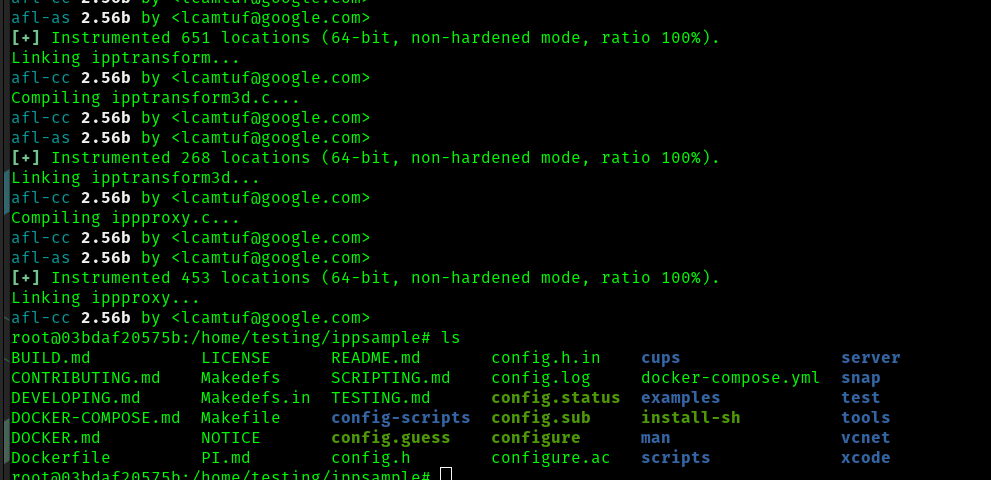
I can also see the server directory is populated as expected

Once ippsample source code has been successfully compiled, we should see the server under test (ippserver) in the server folder. We can test the server by running the following commands using the client ipptool (tools folder). I strongly suggest you to create a RAM disk for the printing spooler.
I now will run the following commands to create the RAM disk, and test the ipp server.
# Create a RAM disk
mkdir /tmp/afl-ramdisk
chmod 777 /tmp/afl-ramdisk
sudo mount -t tmpfs -o size=512M tmpfs /tmp/afl-ramdisk
export AFL_TEMP=/tmp/afl-ramdisk
mkdir $AFL_TEMP/spool
# Move to the folder containing ippserver
cd $WORKDIR/ippsample/server
# Run ippserver on port 631 (-p), adding MIME type support for text/plain (-f), spool in RAM disk (-d), with verbose output (-vvvv)
# You may need to run the following command with sudo
# WARNING: if you have cups installed, you should first stop it
./ippserver -p 631 -f text/plain -d $AFL_TEMP/spool -vvvv printerName
# If you have problem starting ippserver, you should need to start following services:
# sudo service dbus start && sudo service avahi-daemon
# In this example we try to print a txt and to cancel the printing job
# From another terminal, move to the folder containing ipptool (client)
cd $WORKDIR/ippsample/tools
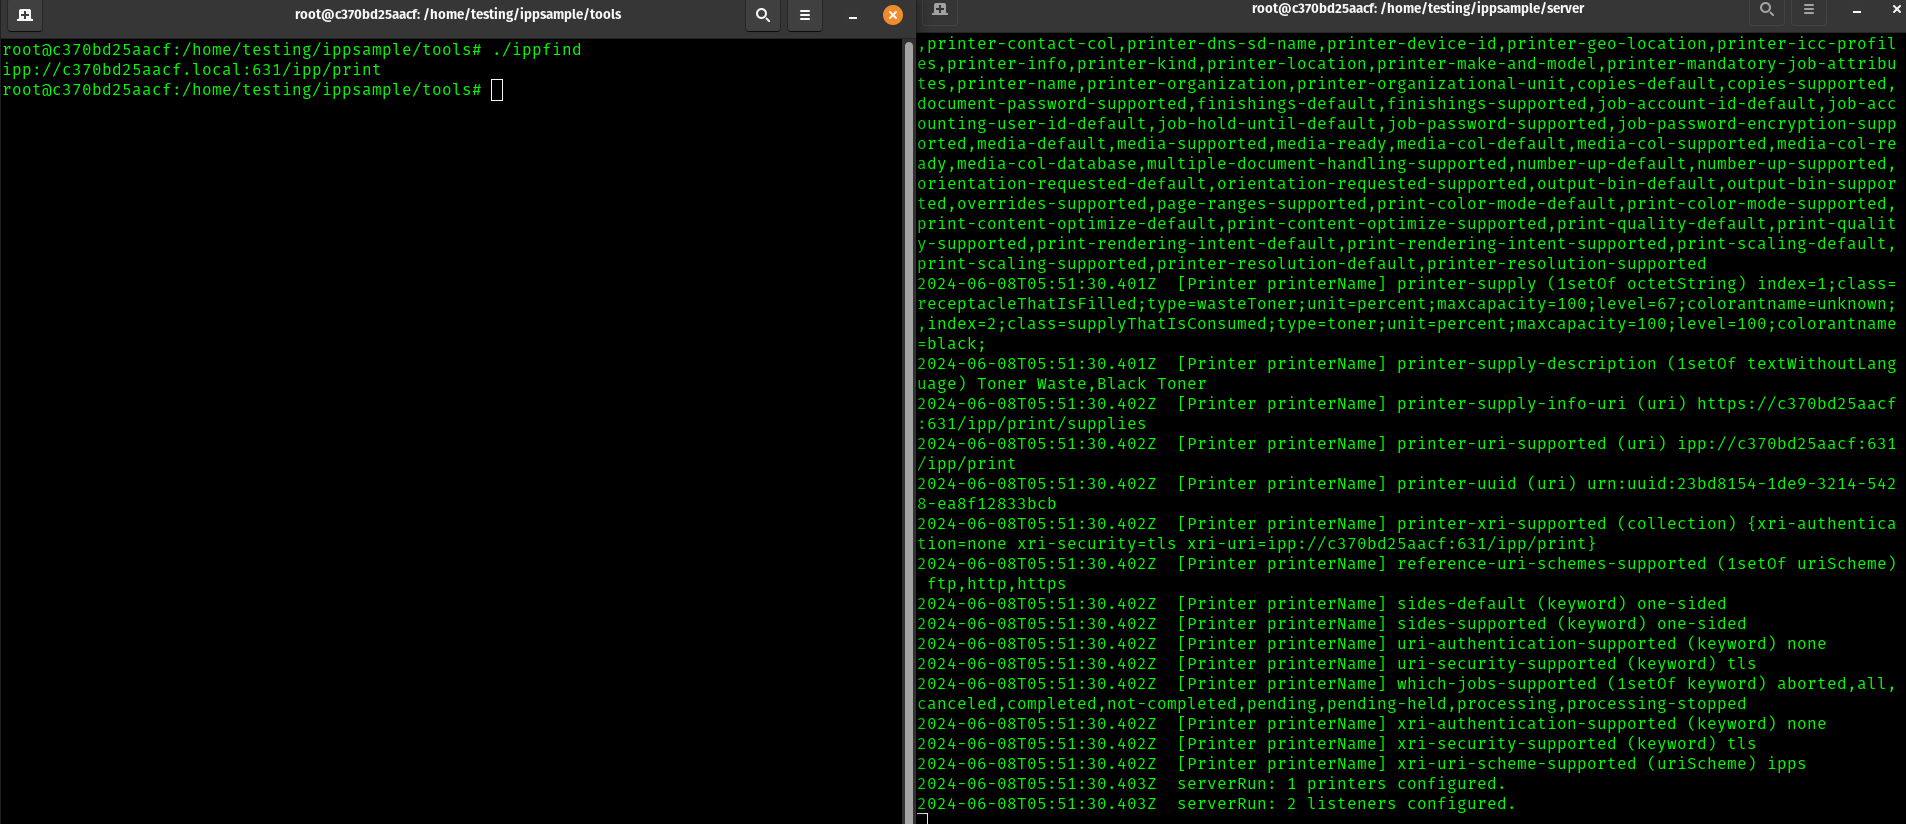
# To get the URI of the printer(s), run ippfind
./ippfind
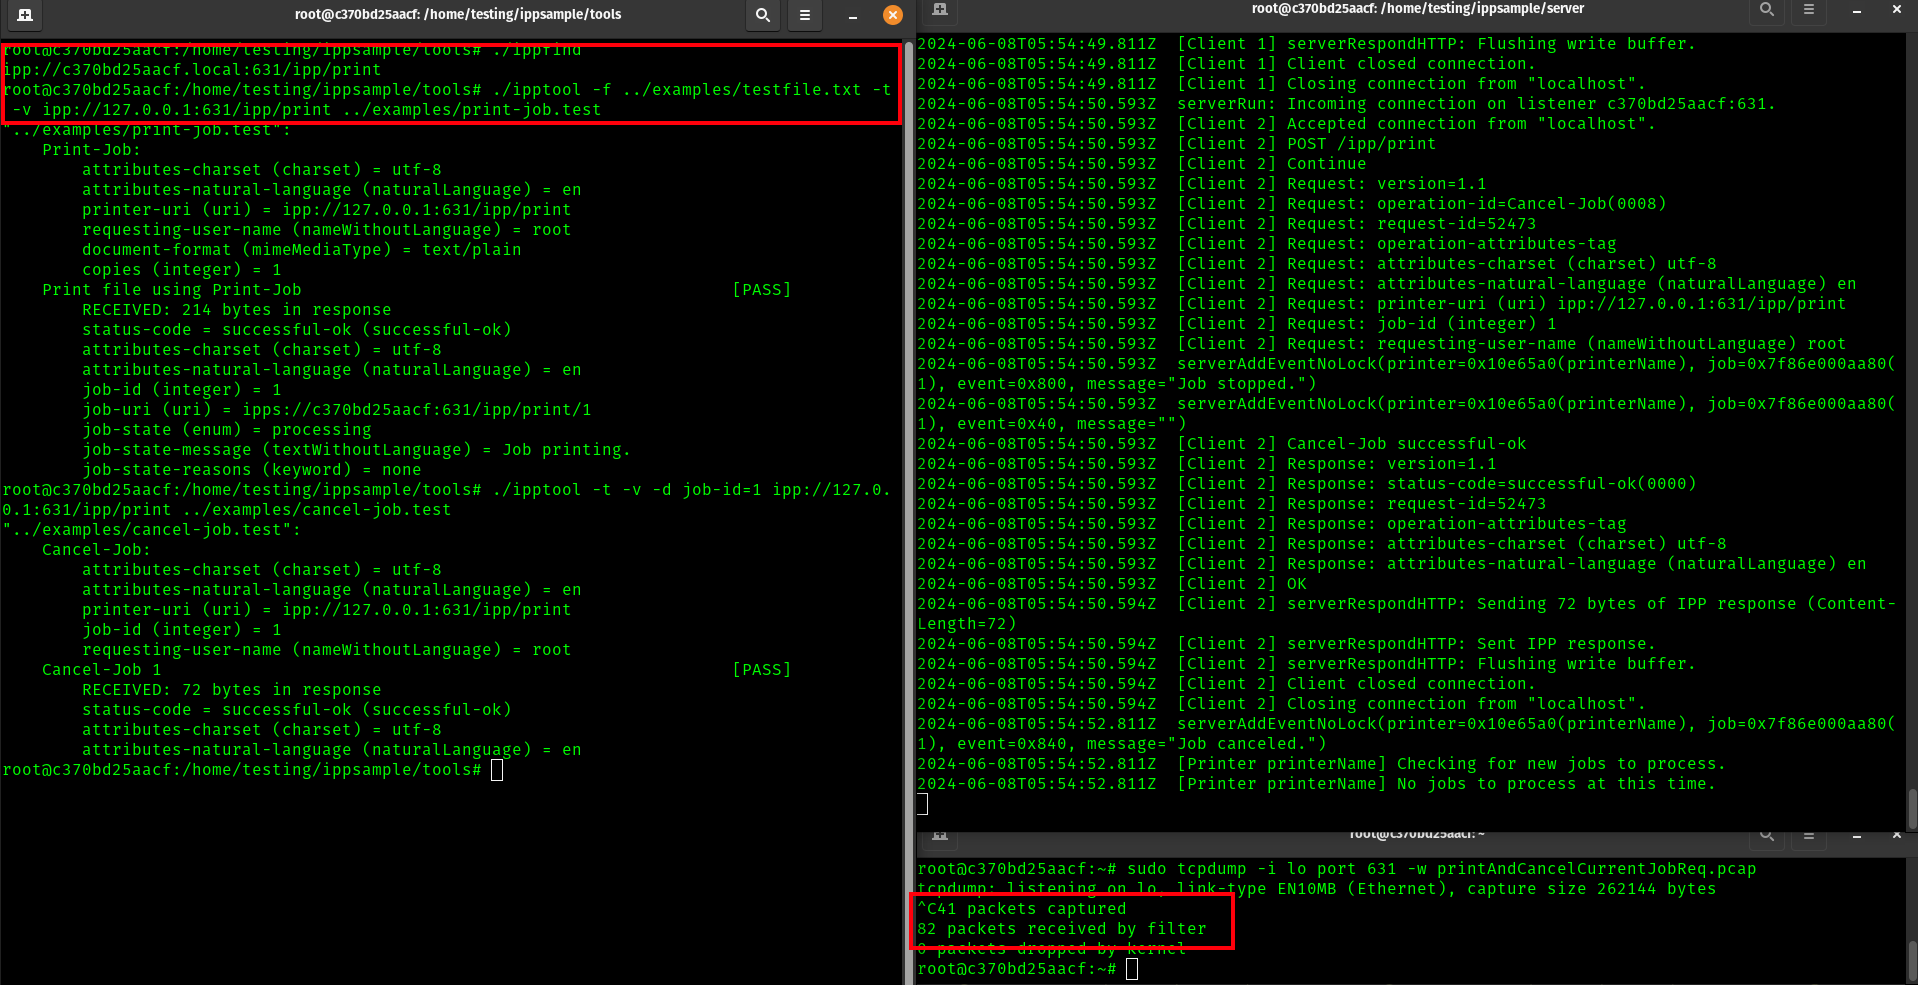
# Record traffic data with tcpdump
sudo tcpdump -i lo port 631 -w printAndCancelCurrentJobReq.pcap
# Run client to send a print request for the txt file (-f), produce a test report (-t), verbose output (-v), followed by the URI of the printer
./ipptool -f ../examples/testfile.txt -t -v ipp://127.0.0.1:631/ipp/print ../examples/print-job.test
# Run client to send a cancel job request for the job number 1 (-d), produce a test report (-t), verbose output (-v), followed by the URI of the printer
# You should run the following command immediately after the previus one
# If you aren't fast enough, you can edit the ../examples/print-job.test file to print more copies, for example 100: ATTR integer copies 100
./ipptool -t -v -d job-id=1 ipp://127.0.0.1:631/ipp/print ../examples/cancel-job.test
# If you get an error for job-id 1, stop the server and start it again, or change the job-id value in -d.
At the point shown here, I have the ipp server running, and I can see an address with ipp find
Now, we've run the commands to send the print job and cancle it, along with taking a tcpdump at the time designated as printAndCancelCurrentJobReq.pcap
Step-1. Prepare message sequences as seed inputs
I'll follow the same steps as the live555 example to generate seed inputs from this capture. This involves opening the capture in wireshark and looking at the tcp stream. Then I export one side of the raw stream.
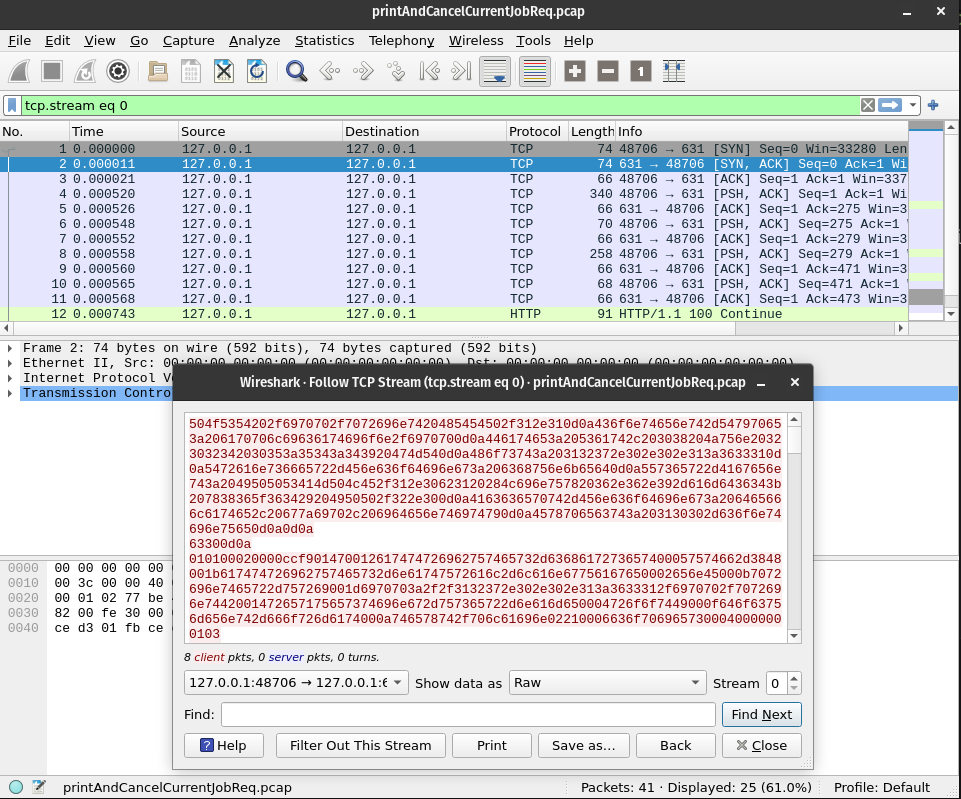
I've saved this to ipstream_raw
Step-2. Fuzzing
Now on to fuzzing. Likewise for this exercise, I will use the supplied corpus input rather than my own gathered in step 1 to avoid the likelyhood of a mistake since this is a long running process
The following commands from the readme will help
cd $WORKDIR/ippsample/server
cp $AFLNET/tutorials/ippsample/ippcleanup.sh ./
chmod +x ippcleanup.sh
# Edit the ippcleanup.sh with the spool directory you choosed (/tmp/afl-ramdisk/spool in this case)
# You may need to run the following command with sudo
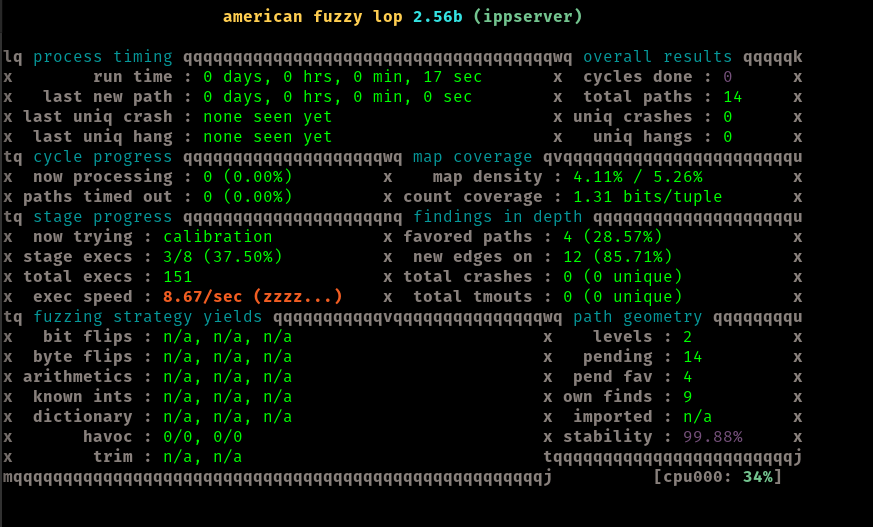
afl-fuzz -d -i $AFLNET/tutorials/ippsample/in-ipp/ -o out-ipp/ -N tcp://127.0.0.1/631 -x $AFLNET/tutorials/ippsample/ipp.dict -P IPP -D 100000 -t 2000 -q 3 -s 3 -E -K -R -m 150 -c ippcleanup.sh ./ippserver -p 631 -f text/plain -d /tmp/afl-ramdisk/spool printerName
Some setup comes first

Now we start fuzzing
TODO: end of fuzzing